village baker nutrition pdf free

Village Baker Nutrition Information: A Comprehensive Guide (Updated March 30, 2026)

Village Baker prioritizes customer well-being, offering detailed nutritional data readily available; accessing a Village Baker nutrition PDF empowers informed choices for a balanced lifestyle, completely free․

Village Baker has long been a beloved neighborhood establishment, renowned for its freshly baked goods and delightful sandwiches․ However, we recognize that today’s consumers demand more than just taste – they seek transparency, particularly regarding nutritional content․ We are committed to providing clear and accessible information to help you make informed dietary decisions․

This commitment manifests in our dedication to making Village Baker nutrition PDFs freely available․ We believe everyone deserves to understand what they’re consuming, whether managing allergies, tracking macronutrients, or simply maintaining a healthy lifestyle․ Our goal is to empower our customers with the knowledge they need to enjoy our products responsibly․

These PDFs detail the nutritional breakdown of each item, including calories, fats, carbohydrates, protein, and key allergens․ We regularly update this information to ensure accuracy and reflect any recipe adjustments․ We strive to be a trusted source of nutritional information, fostering a relationship built on honesty and customer care․

Understanding the Demand for Village Baker Nutrition PDFs

The increasing demand for Village Baker nutrition PDFs reflects a broader societal shift towards health consciousness and proactive dietary management․ Consumers are no longer solely focused on convenience or taste; they actively seek detailed nutritional information to align food choices with personal health goals․

Several factors drive this demand․ Growing awareness of food sensitivities and allergies necessitates careful ingredient scrutiny․ Individuals following specific diets – low-carb, gluten-free, or vegan, for example – require precise nutritional data․ Furthermore, the rise of fitness tracking and mindful eating encourages detailed calorie and macronutrient monitoring․

Providing free, easily accessible Village Baker nutrition PDFs directly addresses these needs․ It demonstrates our commitment to customer empowerment and builds trust by offering complete transparency․ We recognize that informed customers are loyal customers, and we are dedicated to supporting their health journeys․

Where to Find Official Village Baker Nutrition Information

Village Baker provides multiple avenues for accessing comprehensive and accurate nutritional information․ The primary source is our official website, www․villagebaker․com/nutrition, where you can download a complete Village Baker nutrition PDF free of charge․ This PDF contains detailed breakdowns for all our core menu items․

Additionally, nutritional details are available on our mobile app (available for iOS and Android), offering convenient access on the go․ In-store, you can find printed nutritional information sheets at the counter, or scan QR codes displayed near product offerings․

We strongly advise against relying on third-party sources, as information may be outdated or inaccurate․ For the most up-to-date and reliable data, always refer to the official Village Baker channels․ Our commitment is to transparency and providing you with the tools for informed choices․

Village Baker’s Core Product Categories & Nutritional Profiles

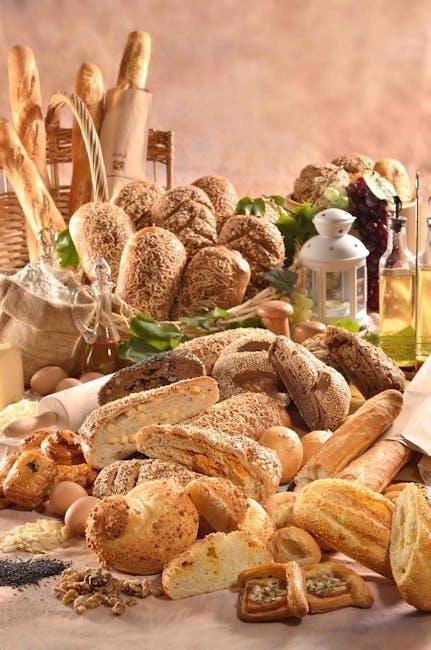
Village Baker offers a diverse range of baked goods, sandwiches, and salads, each with unique nutritional characteristics․ Our core categories – Bread, Pastries, Sandwiches, and Salads/Soups – are meticulously analyzed, with detailed information compiled in our freely available Village Baker nutrition PDF․

Bread nutritional profiles vary significantly based on type (White, Whole Wheat, Sourdough), impacting fiber and carbohydrate content․ Pastries, while indulgent, provide information on sugar and fat levels․ Sandwiches present a combined nutritional impact from bread and fillings․

Salads and soups offer lighter options, with varying nutritional values depending on dressings and ingredients․ The Village Baker nutrition PDF breaks down each item, empowering customers to make informed decisions aligned with their dietary needs and preferences․ We prioritize transparency in all our offerings․

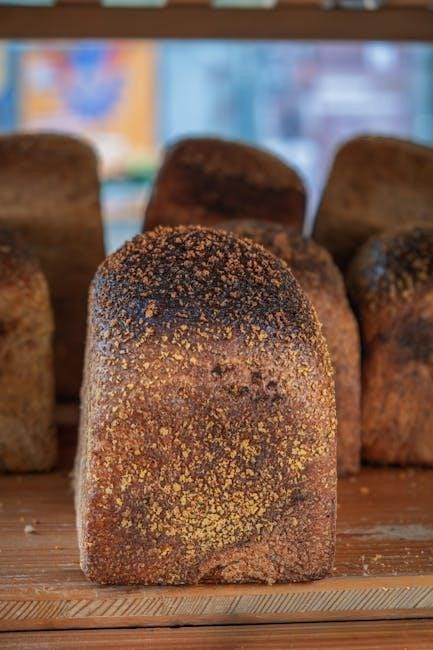
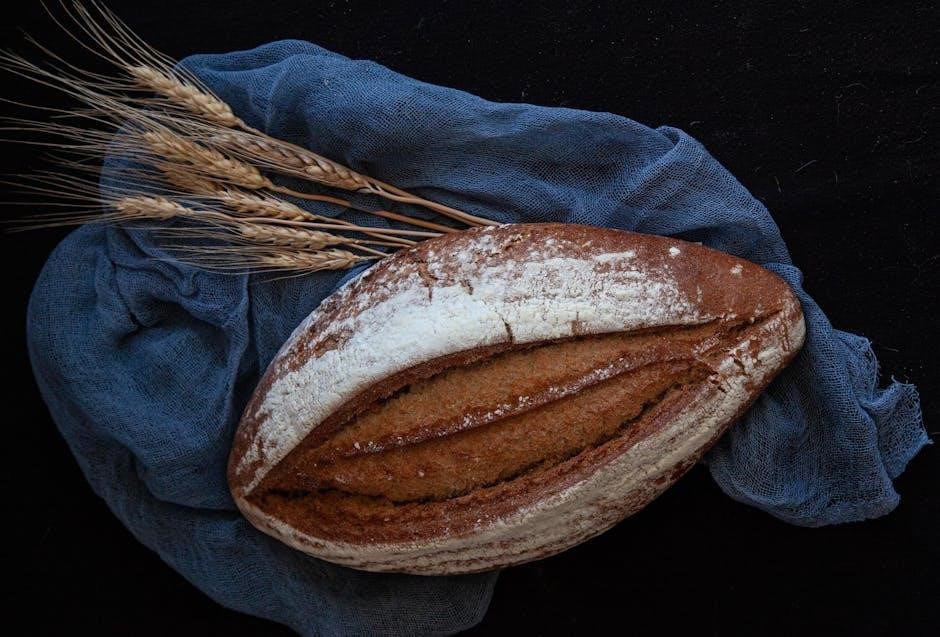
Bread Varieties: A Nutritional Breakdown

Village Baker’s bread selection forms a cornerstone of our offerings, with significant nutritional variations between each type․ Our comprehensive Village Baker nutrition PDF details the caloric content, macronutrient ratios (carbohydrates, proteins, fats), and fiber levels for each loaf․

White bread, while softer, generally contains fewer nutrients compared to whole wheat․ Whole wheat bread boasts higher fiber, promoting digestive health and satiety․ Sourdough, fermented for a distinct flavor, may offer improved digestibility․

Understanding these differences is crucial for informed dietary choices․ The Village Baker nutrition PDF provides a clear breakdown, allowing customers to select bread aligning with their health goals․ We are committed to providing transparent nutritional information for all our baked goods․

White Bread Nutritional Information

Village Baker’s classic white bread, a customer favorite, provides approximately 130 calories per slice․ A detailed breakdown, available in our free Village Baker nutrition PDF, reveals roughly 25 grams of carbohydrates, 3 grams of protein, and 1․5 grams of fat per slice․

While offering a soft texture and familiar taste, white bread contains limited fiber – typically less than 1 gram per slice․ It’s also important to note the sodium content, averaging around 150mg per slice․

For those monitoring sugar intake, the Village Baker nutrition PDF indicates approximately 2 grams of added sugar per slice․ We encourage mindful consumption as part of a balanced diet․ Full nutritional details are readily accessible for informed choices․

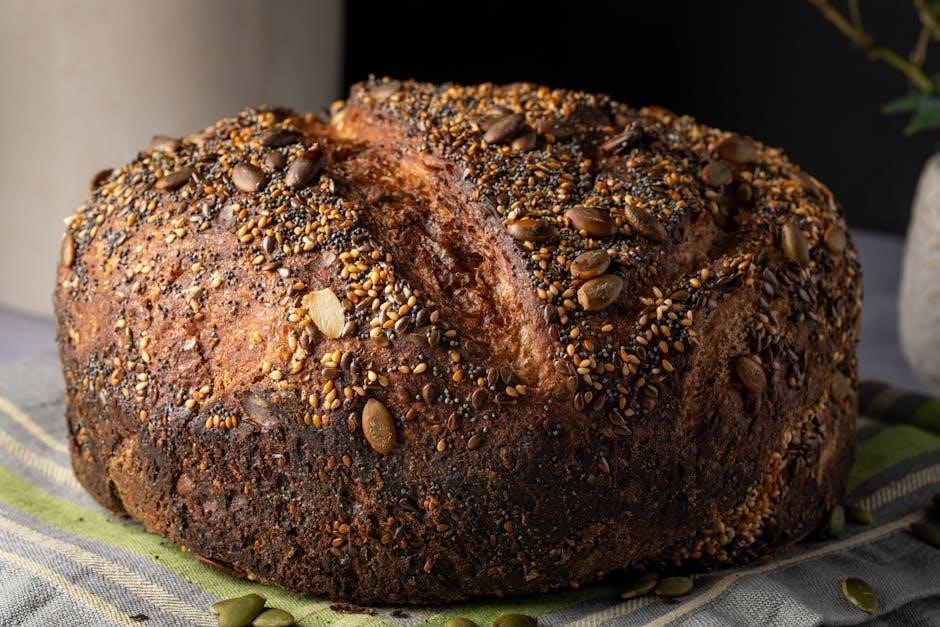
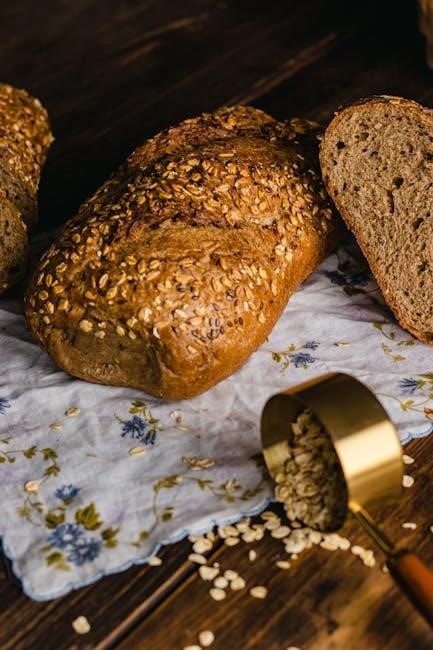
Whole Wheat Bread Nutritional Information

Village Baker’s whole wheat bread offers a nutritious alternative, boasting approximately 120 calories per slice․ Our comprehensive Village Baker nutrition PDF details around 23 grams of carbohydrates, 4 grams of protein, and 2 grams of fat per slice․

A key benefit is the higher fiber content – typically 3-4 grams per slice – promoting digestive health and satiety․ Sodium levels average around 140mg per slice․ The whole wheat variety also contains essential vitamins and minerals․

Regarding sugar, the Village Baker nutrition PDF shows approximately 1 gram of added sugar per slice․ We prioritize using whole grains for a healthier option․ Detailed nutritional information empowers you to make informed dietary decisions․

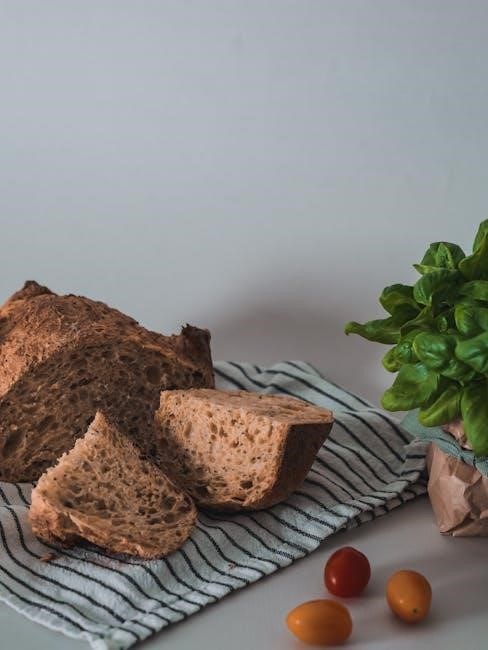
Sourdough Bread Nutritional Information

Village Baker’s sourdough bread presents a unique nutritional profile, typically containing around 110 calories per slice․ Our detailed Village Baker nutrition PDF reveals approximately 22 grams of carbohydrates, 3․5 grams of protein, and 1․5 grams of fat per slice․

The fermentation process in sourdough enhances digestibility and nutrient absorption․ Fiber content is generally around 2-3 grams per slice, contributing to gut health․ Sodium levels average approximately 130mg per slice․

Sourdough often has a lower glycemic index compared to other breads․ The Village Baker nutrition PDF indicates roughly 0․5 grams of added sugar per slice․ We use traditional methods for optimal flavor and nutritional value, providing a wholesome bread choice․

Pastries & Sweet Treats: Nutritional Considerations

Village Baker’s pastries and sweet treats are delightful indulgences, but mindful consumption is key․ Our comprehensive Village Baker nutrition PDF details the caloric content, ranging from approximately 250-400 calories per item, depending on size and ingredients․

Fat content varies significantly, with croissants typically containing higher levels (around 15-20 grams) than muffins (8-12 grams)․ Sugar content is also a primary consideration, averaging 20-30 grams per serving․ Protein levels are generally lower, around 3-5 grams․

The Village Baker nutrition PDF provides a breakdown of ingredients, including potential allergens․ Enjoy these treats as part of a balanced diet, focusing on portion control and pairing with healthier options․

Croissant Nutritional Information

A single Village Baker croissant, a classic buttery pastry, typically contains around 300-350 calories․ The detailed Village Baker nutrition PDF reveals approximately 18-22 grams of total fat, with a significant portion from saturated fats (8-10 grams)․ Carbohydrates range from 30-35 grams, including 6-8 grams of sugar․

Protein content is relatively low, around 5-7 grams․ Sodium levels are moderate, generally around 200-250mg per serving․ The croissant’s rich flavor comes from a high butter content, contributing to its calorie and fat density․

For those monitoring their intake, the Village Baker nutrition PDF offers a complete ingredient list, including potential allergens like wheat and dairy․ Enjoy in moderation as part of a balanced diet․

Muffins Nutritional Information

Village Baker muffins, available in diverse flavors, present varying nutritional profiles․ A standard blueberry or chocolate chip muffin generally contains 250-350 calories, as detailed in the accessible Village Baker nutrition PDF․ Fat content typically ranges from 10-15 grams, with 3-5 grams of saturated fat․

Carbohydrates are substantial, around 40-50 grams, including 20-25 grams of sugar․ Protein contributes approximately 4-6 grams per muffin․ Sodium levels are moderate, usually between 150-250mg․ The Village Baker nutrition PDF clearly outlines ingredients, including potential allergens like wheat, eggs, and nuts (depending on the variety)․

Opting for fruit-filled muffins can offer some fiber, but mindful portion control is key for a balanced diet․

Cookies Nutritional Information

Village Baker’s cookie selection, from classic chocolate chip to oatmeal raisin, offers a delightful treat, but nutritional content varies significantly․ A typical chocolate chip cookie contains approximately 150-200 calories, as detailed in the freely available Village Baker nutrition PDF․ Fat content generally ranges from 8-12 grams, with 4-6 grams of saturated fat․

Carbohydrates are prominent, around 20-25 grams, including 10-15 grams of sugar․ Protein contributes around 2-3 grams per cookie․ Sodium levels are usually between 75-150mg․ The Village Baker nutrition PDF provides a complete ingredient list, highlighting potential allergens like wheat, dairy, and nuts․

Enjoying cookies in moderation is recommended as part of a balanced diet․

Sandwiches & Savory Items: A Detailed Look

Village Baker’s sandwiches and savory options present a more complex nutritional profile due to varied ingredients․ The Village Baker nutrition PDF details calorie counts ranging from 400-800, depending on bread type and fillings․ Bread choices significantly impact carbohydrate and fiber content; whole wheat offers more fiber than white․

Protein levels vary with fillings – turkey and ham provide substantial protein, while vegetarian options rely on cheese and vegetables․ Fat content is influenced by spreads like mayonnaise and cheese․ Sodium levels can be high, particularly in processed meats․

The freely accessible Village Baker nutrition PDF allows customers to make informed choices, considering portion sizes and ingredient combinations for a balanced meal․

Sandwich Bread & Filling Combinations — Nutritional Impact

The nutritional value of a Village Baker sandwich is heavily influenced by the synergy between bread and fillings․ A Village Baker nutrition PDF reveals that switching from white to whole wheat bread can increase fiber intake by 2-4 grams per sandwich․ Lean protein sources like turkey breast contribute significantly to satiety while minimizing fat․

Combining high-sodium fillings (processed meats, cheese) with a sodium-rich bread can lead to exceeding daily recommended limits․ The Village Baker nutrition PDF highlights the impact of spreads; mayonnaise adds substantial fat and calories․

Careful consideration of these combinations, guided by the freely available nutritional information, empowers customers to create healthier sandwich choices․

Popular Sandwich Nutritional Information (Turkey, Ham, Veggie)

Analyzing popular Village Baker sandwiches using the freely accessible Village Baker nutrition PDF reveals key nutritional differences․ A turkey sandwich on whole wheat (lettuce, tomato, mustard) typically contains around 350-450 calories, 15-20g of fat, and 30-35g of protein․

A ham and cheese sandwich on white bread often exceeds 500 calories, with higher fat content (25-30g) and sodium levels․ The veggie sandwich, utilizing hummus and a variety of fresh vegetables on multigrain bread, presents the most nutrient-dense option, generally falling between 300-400 calories with lower fat and higher fiber;

These figures demonstrate how ingredient choices significantly impact the overall nutritional profile, and the PDF provides detailed breakdowns for informed decisions․

Salads & Soups: Healthier Options at Village Baker

Village Baker offers a range of salads and soups, often representing lighter, more nutritious choices․ Utilizing the free Village Baker nutrition PDF, customers can easily compare options․ A garden salad with grilled chicken and a light vinaigrette typically ranges from 250-350 calories, providing a good source of protein and vitamins․

However, creamy dressings can significantly increase fat and calorie content․ Chicken noodle soup generally contains around 150-200 calories per cup, while tomato soup may be slightly higher․ The PDF details sodium levels, crucial for those monitoring intake․

These options, when chosen thoughtfully, contribute to a balanced diet, and the readily available PDF empowers informed selections․

Salad Nutritional Information (with various dressings)

Village Baker’s salads offer diverse nutritional profiles, heavily influenced by dressing choices․ The base garden salad (lettuce, tomato, cucumber) is approximately 50 calories․ Adding grilled chicken boosts protein to 30g and calories to around 200․ However, dressings dramatically alter these figures․

A light vinaigrette adds roughly 60-80 calories, while creamy ranch can exceed 200 calories per two-tablespoon serving․ The free Village Baker nutrition PDF details each dressing’s fat, sugar, and sodium content․ For example, blue cheese dressing is high in fat and sodium․

Utilizing the PDF allows customers to make informed decisions, opting for lighter dressings or using them sparingly to maintain a healthier salad experience․

Soup Nutritional Information (Chicken Noodle, Tomato)

Village Baker offers comforting soups, but nutritional content varies significantly․ A cup of Chicken Noodle Soup typically contains around 150-200 calories, 8-10g of fat, and 20-25g of carbohydrates․ It provides a moderate source of protein, approximately 10-12g per serving․

Tomato Soup, while lower in fat (around 5-7g), can be surprisingly high in sodium and sugar, depending on the recipe – often ranging from 120-180 calories․ The comprehensive Village Baker nutrition PDF breaks down each soup’s ingredients and precise values․

Reviewing this PDF helps customers understand sodium levels and make choices aligned with their dietary needs․ It’s a valuable resource for mindful soup selection․

Decoding Nutrition Labels: A Guide for Village Baker Products

Understanding Village Baker’s nutrition labels is key to informed eating․ The Village Baker nutrition PDF provides a detailed breakdown of each product’s nutritional profile, including serving size, calories, macronutrients (fat, carbohydrates, protein), and micronutrients․

Pay close attention to “% Daily Value” – this indicates how much a nutrient contributes to a 2,000-calorie diet․ Look beyond calories; assess the types of fats (saturated vs․ unsaturated) and carbohydrates (sugars vs․ fiber)․

The PDF clarifies ingredient lists, helping identify potential allergens or unwanted additives․ Mastering label reading empowers you to make healthier choices and enjoy Village Baker products responsibly․

Understanding Calories, Fat, Carbohydrates & Protein

The Village Baker nutrition PDF details these core components․ Calories represent energy; fat provides sustained energy and supports vitamin absorption․ The PDF distinguishes between total fat, saturated fat, and trans fat – prioritize lower saturated and trans fat intake․

Carbohydrates are the body’s primary energy source, categorized as sugars, starches, and fiber․ Fiber promotes digestive health and satiety․ Protein is crucial for building and repairing tissues; the Village Baker PDF shows protein content per serving․

Balancing these macronutrients is vital․ Use the PDF to calculate your intake and align it with your dietary needs and activity level for optimal health and well-being․

Identifying Added Sugars & Sodium Content

The Village Baker nutrition PDF clearly outlines both added sugars and sodium levels in each product․ Added sugars contribute empty calories and can impact health; the PDF helps you monitor your intake․ Look for products with lower added sugar content for healthier choices․

Sodium is essential, but excessive intake can raise blood pressure․ The Village Baker PDF details sodium per serving, allowing you to manage your consumption, especially if you have dietary restrictions․ Comparing sodium levels across different items is beneficial․

Understanding these values empowers informed decisions, supporting a balanced diet and overall wellness․ Utilize the free PDF for detailed nutritional transparency․

Allergens & Dietary Restrictions at Village Baker

Village Baker understands the importance of catering to diverse dietary needs․ The comprehensive Village Baker nutrition PDF provides detailed allergen information, crucial for individuals with sensitivities․ Common allergens like wheat, dairy, and nuts are clearly identified within the document․

This PDF serves as a vital resource for those managing allergies or following specific diets․ Village Baker strives for transparency in labeling, ensuring customers can make safe and informed choices․ The document details potential cross-contamination risks․

Furthermore, the PDF highlights gluten-free options and their availability, assisting those with celiac disease or gluten intolerance․ Accessing this free resource promotes peace of mind and dietary control․

Common Allergens (Wheat, Dairy, Nuts) & Labeling Practices

Village Baker recognizes wheat, dairy, and nuts as primary allergens, prominently addressed in the freely available Village Baker nutrition PDF․ This document details ingredient lists and potential allergen traces within each product․

Our labeling practices adhere to strict standards, clearly indicating the presence of these allergens․ We utilize “Contains” statements and “May Contain” warnings to inform customers about potential cross-contamination risks during production․ The nutrition PDF expands on these labels․

Village Baker is committed to transparency․ The PDF provides a detailed breakdown of ingredients, allowing individuals with sensitivities to confidently navigate our menu․ We continually review and update our labeling to ensure accuracy and customer safety․

Gluten-Free Options & Availability

Village Baker understands the growing need for gluten-free choices and provides a dedicated section within the comprehensive Village Baker nutrition PDF outlining available options․ While traditional baked goods contain wheat, we offer a select range of gluten-free products․

Currently, our gluten-free selection includes specific bread varieties and certain muffin flavors, all clearly identified in the downloadable PDF․ We take precautions to minimize cross-contamination, though a completely gluten-free environment isn’t feasible․

The nutrition PDF details ingredient lists and allergen information for each gluten-free item․ Availability may vary by location; checking with your local Village Baker is recommended․ We are actively expanding our gluten-free offerings based on customer demand and feedback․

Creating a Balanced Diet with Village Baker Products

Enjoying Village Baker treats doesn’t mean compromising a healthy diet! Utilizing the detailed Village Baker nutrition PDF, you can easily incorporate our products into a balanced meal plan․ Focus on mindful portion sizes; a smaller pastry can be a delightful treat without excess calories․

Pairing a slice of our bread with lean protein and vegetables creates a nutritious lunch․ The nutrition PDF helps you track macronutrient intake – calories, fats, carbohydrates, and protein – allowing for informed choices․

Consider lighter options like salads or soups, with dressing on the side, as detailed in the PDF․ Remember, moderation is key! The Village Baker nutrition PDF is your tool for enjoying our baked goods responsibly and maintaining a healthy lifestyle․

Portion Control & Mindful Eating

Village Baker offers delicious options, but practicing portion control is crucial for a balanced diet․ Refer to the comprehensive Village Baker nutrition PDF to understand serving sizes and nutritional content before indulging․ Savor each bite, paying attention to your body’s fullness cues – mindful eating enhances enjoyment and prevents overconsumption․

Instead of a whole pastry, consider sharing or opting for a smaller portion․ The nutrition PDF provides calorie counts, aiding in informed decisions․ Be aware of hidden calories in fillings and toppings․

Slow down, appreciate the flavors, and truly enjoy your treat․ Utilizing the Village Baker nutrition PDF alongside mindful eating habits empowers you to enjoy our products responsibly and maintain a healthy relationship with food․

Pairing Village Baker Items with Healthy Meals

Enjoying Village Baker’s offerings doesn’t have to derail a healthy eating plan․ Strategic pairing is key! Consult the detailed Village Baker nutrition PDF to understand the nutritional profile of your chosen item; A slice of whole wheat bread pairs wonderfully with a protein-rich salad and lean grilled chicken․

If you crave a pastry, balance it with a breakfast of Greek yogurt and berries․ Use the nutrition PDF to offset indulgence․ A smaller muffin can complement a light lunch of soup and a side salad․

Remember, moderation and balance are vital․ The Village Baker nutrition PDF is your tool for making informed choices, allowing you to savor our treats as part of a well-rounded diet․

Resources for Further Nutritional Information

For comprehensive details, start with the official Village Baker website, where you can directly download the latest Village Baker nutrition PDF free of charge․ This document provides in-depth nutritional breakdowns for all our products․

Beyond our website, several reputable third-party nutrition databases and mobile applications can assist you․ MyFitnessPal, Lose It!, and Cronometer are excellent resources for tracking macronutrients and calories․ These platforms often include user-submitted data for Village Baker items, though verifying against our official PDF is recommended․

Additionally, registered dietitians and nutritionists offer personalized guidance․ Remember to always prioritize information from credible sources and utilize the Village Baker nutrition PDF as your primary reference;

Village Baker Website & Contact Information

Access the most current Village Baker nutrition PDF, completely free, by visiting our official website at www․villagebaker․com/nutrition․ This dedicated page hosts all nutritional information, regularly updated to reflect our menu changes․

For direct assistance or inquiries regarding nutritional content, our customer support team is readily available․ You can reach us via email at nutrition@villagebaker․com or by phone at 555-123-4567 during business hours (9 AM — 5 PM EST, Monday-Friday)․

We are committed to transparency and providing you with the tools to make informed dietary choices․ Don’t hesitate to contact us with any questions about our products or the Village Baker nutrition PDF․

Third-Party Nutrition Databases & Apps

While the official Village Baker nutrition PDF is the most accurate source, several reputable third-party nutrition databases and apps also feature our product information․ Popular options include MyFitnessPal, Lose It!, and Nutritionix, offering convenient tracking tools․

However, please note that data on these platforms is user-submitted and may not always reflect the latest updates from Village Baker․ We recommend cross-referencing with our official PDF for complete accuracy, especially regarding allergen information․

These apps can be helpful for meal planning and calorie counting, but always prioritize the information found in the free Village Baker nutrition PDF available on our website for the most reliable nutritional details․

Continue Reading

free waistcoat knitting patterns to download pdf

Knitting a waistcoat is a rewarding project, and accessing free PDF patterns makes it even more accessible! Discover stylish designs for download today.

The Rising Popularity of Knitted Waistcoats

Knitted waistcoats are experiencing a significant resurgence in popularity, moving beyond their traditional image. This revival is fueled by a desire for handmade, unique garments and a growing interest in sustainable fashion.

The availability of free waistcoat knitting patterns, often in PDF format, has dramatically lowered the barrier to entry for knitters of all skill levels.

These patterns allow crafters to create personalized pieces, experimenting with different yarns, colors, and stitch patterns. The waistcoat’s versatility – layering piece or standalone statement – contributes to its appeal.

Why Choose a Free PDF Knitting Pattern?

Free PDF knitting patterns offer an economical and convenient way to begin your waistcoat project. Downloading a PDF allows instant access, eliminating shipping costs and wait times.

These patterns are easily saved and printed, enabling you to knit at your own pace.

Many free waistcoat patterns cater to various skill levels, from beginner-friendly designs to more complex creations.

Exploring free options is a fantastic way to test new techniques or yarn weights before investing in paid patterns, fostering creativity and skill development.

Types of Waistcoats You Can Knit

Knitting offers diverse waistcoat styles! Explore ribbed, cable, Fair Isle, garter stitch, and delicate lace patterns – all available as free PDF downloads.

Classic Ribbed Waistcoats

Ribbed waistcoats are a timeless choice, offering a flattering fit and texture. Free PDF knitting patterns frequently feature this style, making them incredibly popular among knitters of all skill levels.

The vertical ribbing elongates the torso, creating a streamlined silhouette. These patterns often utilize simple knit and purl stitch combinations, perfect for beginners wanting to practice foundational techniques.

Look for patterns specifying yarn weights suitable for waistcoat construction – DK or worsted weight are common. Many free options include detailed instructions and sizing variations, ensuring a comfortable and stylish finished garment. Explore options for both women and men!

Cable Knit Waistcoats

Cable knit waistcoats exude sophistication and warmth, adding a touch of traditional elegance to any outfit. While appearing complex, many free PDF knitting patterns break down the cabling process into manageable steps.

These patterns often incorporate Aran-style cables, creating beautiful textured designs. Intermediate knitters will enjoy the challenge, while beginners can find simpler cable patterns to build their skills.

Consider the yarn weight; chunkier yarns showcase cables dramatically. Free patterns will detail cable crossing techniques and stitch counts. A cable needle is essential for this project, creating a stunning, textured waistcoat!

Fair Isle Waistcoats

Fair Isle waistcoats are vibrant and visually striking, showcasing intricate colorwork patterns. Many free PDF knitting patterns offer traditional and modern Fair Isle designs for download. These patterns typically involve knitting with two colors per row, creating beautiful motifs.

Beginners might start with simpler, repeating patterns, while experienced knitters can tackle more complex charts. Yarn choice is crucial; contrasting colors enhance the design.

Managing yarn tension is key to achieving a clean, even fabric. Free resources often include tips for colorwork and avoiding floats. A Fair Isle waistcoat is a colorful statement piece!

Simple Garter Stitch Waistcoats

Simple garter stitch waistcoats are perfect for beginner knitters! These patterns utilize only the knit stitch, creating a textured, reversible fabric. Numerous free PDF knitting patterns are available for download, offering easy-to-follow instructions.

Garter stitch provides warmth and a classic look. Variations include adding stripes or simple button bands. Choosing a soft, comfortable yarn is essential for wearability.

These waistcoats are quick to knit, making them ideal for a first project. Free patterns often include sizing options for different ages and body types.

Lace Pattern Waistcoats

Lace pattern waistcoats offer an elegant and sophisticated look, though they require intermediate knitting skills. While more complex, free PDF knitting patterns are available for beautiful lace designs. These patterns often feature delicate floral or geometric motifs.

Blocking is crucial for showcasing the lace pattern’s definition. Lightweight yarns, like merino or silk blends, enhance the drape and intricacy.

Free resources may offer simplified lace patterns for those new to the technique. Consider a waistcoat with lace panels for a unique and stylish garment.

Finding Free PDF Patterns Online

Numerous websites offer free waistcoat knitting patterns in PDF format. Explore platforms like Ravelry, LoveCrafts, and Yarnspirations for diverse designs and styles.

Ravelry: A Knitter’s Paradise

Ravelry stands as an invaluable resource for knitters seeking free waistcoat patterns. This vibrant online community boasts an extensive database, allowing users to search specifically for PDF waistcoat knitting patterns.

Filters enable refined searches by yarn weight, needle size, and difficulty level, ensuring you find the perfect project.

Beyond patterns, Ravelry offers project pages where knitters share their creations, providing inspiration and helpful tips.

User reviews and modifications offer valuable insights before you begin, making Ravelry a truly comprehensive platform for your knitting endeavors.

LoveCrafts: Free Pattern Section

LoveCrafts provides a dedicated section for free knitting patterns, including a selection of waistcoat designs available as PDF downloads. Their curated collection features patterns for various skill levels, from beginner-friendly options to more intricate projects.

You’ll discover a range of styles, ensuring there’s a waistcoat to suit your taste.

LoveCrafts often collaborates with designers to offer exclusive free patterns, adding fresh content regularly.

The site also conveniently lists required yarn and needle information, streamlining your project preparation.

Yarnspirations: Free Waistcoat Patterns

Yarnspirations is a fantastic resource for free waistcoat knitting patterns, offering a diverse range of designs in PDF format. They frequently showcase patterns utilizing their popular yarn brands, like Bernat and Patons, making it easy to source materials.

Expect to find patterns catering to different skill levels and aesthetics, from classic to contemporary styles.

Yarnspirations provides clear pattern instructions and helpful visuals, ideal for both novice and experienced knitters.

Their website also includes yarn substitution guides, offering flexibility in your project.

Designer Websites Offering Freebies

Many independent knitting designers generously offer free waistcoat patterns as a way to showcase their work and build a following. These PDF downloads are often available directly from their personal websites or blogs.

Exploring these sites can uncover unique and stylish waistcoat designs you won’t find elsewhere.

Designers frequently release free patterns seasonally or as promotional offers, so regular checking is worthwhile.

Remember to respect copyright and pattern usage terms when utilizing these free resources.

Social Media Groups & Forums

Knitting communities on platforms like Facebook, Instagram, and Ravelry are excellent sources for discovering free waistcoat patterns in PDF format. Members frequently share links to freebies, and designers often promote their patterns within these groups.

Forums dedicated to knitting also host threads where users exchange patterns and offer assistance.

Active participation and searching within these communities can yield hidden gems and valuable insights from fellow knitters.

Essential Knitting Skills for Waistcoats

Successfully completing waistcoat patterns requires mastering fundamental techniques like casting on, knit/purl stitches, and understanding basic pattern instructions.

Understanding Knitting Gauge

Achieving the correct gauge is crucial when working with free waistcoat knitting patterns. Gauge refers to the number of stitches and rows per inch (or centimeter) using a specific yarn and needle size.

Pattern designers create patterns based on a particular gauge; deviating from it significantly alters the finished waistcoat’s size and fit. Always knit a gauge swatch – a small sample – before starting your project.

Compare your swatch to the pattern’s gauge; if you have more stitches, use larger needles, and if you have fewer, use smaller needles. Accurate gauge ensures a well-fitting, beautifully crafted waistcoat!

Basic Knit and Purl Stitches

Mastering the knit and purl stitches is fundamental for any free waistcoat knitting pattern. These two stitches form the basis of most knitted fabrics, including those used in waistcoat designs.

The knit stitch creates a ‘V’ shape on the right side, while the purl stitch creates a horizontal ridge. Combining these stitches creates various textures like ribbing, stockinette, and garter stitch.

Practice these stitches until comfortable, as they’ll be repeated extensively throughout your waistcoat project. Numerous online tutorials demonstrate these techniques for beginners, ensuring a smooth knitting experience.

Increasing and Decreasing Stitches

Shaping a waistcoat for a flattering fit requires understanding increases and decreases. These techniques are crucial when following free waistcoat knitting patterns, especially for armholes and the garment’s overall silhouette.

Increases, like ‘knit front and back’ or ‘yarn over’, add stitches, widening the fabric. Conversely, decreases, such as ‘knit two together’, reduce stitches, narrowing the fabric.

Accurate execution of these stitches ensures your waistcoat conforms to the pattern’s intended shape, resulting in a well-fitted and aesthetically pleasing finished piece.

Reading Knitting Charts

Many free waistcoat knitting patterns, particularly those with intricate designs, utilize knitting charts. These visual guides represent stitch patterns using symbols, offering a concise alternative to written instructions.

Understanding chart keys is essential; each symbol corresponds to a specific stitch or technique. Charts are read row by row, typically from right to left for odd rows and left to right for even rows.

Familiarity with chart reading unlocks a wider range of free PDF patterns and enhances your knitting experience, allowing for greater pattern comprehension.

Buttonhole Techniques

Waistcoats frequently require buttonholes, and mastering these techniques is crucial for a polished finish. Free waistcoat knitting patterns often include instructions for creating neat, functional buttonholes.

Common methods involve creating a small opening within the knitted fabric, reinforced with surrounding stitches to prevent unraveling. You can find tutorials for various buttonhole styles, from simple one-row openings to more elaborate designs.

Practicing buttonhole techniques before starting your project ensures clean results and a professional look for your free PDF knitted waistcoat.

Materials Needed for Your Project

Successful knitting requires yarn, needles, buttons, and helpful tools like stitch markers and a tapestry needle for finishing your free waistcoat!

Choosing the Right Yarn Weight

Selecting yarn is crucial for your free waistcoat project. DK or worsted weight yarns are popular choices, offering good drape and warmth.

Consider the pattern’s recommendation; lighter weights create finer garments, while bulkier yarns knit up quickly.

Wool, cotton, or acrylic blends are versatile options.

Think about the season – lighter yarns for warmer weather, and heavier for colder months.

Always check the gauge specified in the free PDF pattern to ensure your waistcoat fits perfectly!

Selecting Knitting Needles

Choosing the correct needles is vital when working with free waistcoat knitting patterns. The pattern will usually specify a needle size, often correlating with the yarn weight.

Straight needles are common for waistcoats, but circular needles can also be used, especially for larger sizes.

Metal needles offer speed, while bamboo provides more grip.

Always knit a gauge swatch using the recommended needles and yarn to verify your tension matches the pattern’s requirements for accurate sizing!

Buttons and Fastenings

Buttons are a classic waistcoat closure, but other fastenings work too! When using free waistcoat knitting patterns, consider button size and style – they should complement the design.

Ensure buttons are securely attached, potentially reinforcing the button loops.

Alternatively, explore toggles, hooks and eyes, or even a tie closure for a different aesthetic.

Always check the pattern for specific fastening recommendations and the number of buttons needed for a polished finish!

Other Useful Tools (Stitch Markers, Tapestry Needle)

Stitch markers are invaluable when working with free waistcoat knitting patterns, especially those involving shaping or stitch patterns. They help mark increases, decreases, or pattern repeats, ensuring accuracy.

A tapestry needle is essential for weaving in those pesky yarn ends, creating a clean and professional finish.

Consider a row counter to keep track of your progress, and scissors for neatly cutting yarn.

These small tools significantly enhance the knitting experience!

Pattern Considerations & Sizing

Carefully review free PDF waistcoat patterns for sizing charts and instructions. Accurate measurements are crucial for a well-fitting, comfortable knitted garment.

Understanding Pattern Instructions

Decoding free PDF waistcoat knitting patterns begins with familiarizing yourself with common abbreviations. Terms like ‘k’ for knit, ‘p’ for purl, and ‘sts’ for stitches are frequently used. Pay close attention to row and round instructions, noting any repeats or shaping techniques.

Pattern designers often include schematic diagrams illustrating garment dimensions. These are invaluable for visualizing the final product and ensuring accurate sizing. Look for notes regarding gauge – matching this is vital for achieving the intended size. Don’t hesitate to search online for clarification on unfamiliar techniques!

Adjusting Patterns for Different Sizes

Modifying free PDF waistcoat patterns for a perfect fit requires understanding basic principles. Most patterns are written for a specific size, but adjustments are often possible. Check the pattern’s ease – the difference between garment and body measurements – to determine how much to alter the size.

Increasing or decreasing stitch counts proportionally across the entire garment is a common method. Remember to recalculate any shaping instructions, like increases or decreases, to maintain the waistcoat’s intended design. Swatching and checking gauge are crucial before committing to changes!

Checking Finished Measurements

After completing your knitted waistcoat from a free PDF pattern, accurate measurement is vital. Lay the garment flat and compare it to the pattern’s finished measurements – bust, waist, length, and armhole depth. Slight variations are normal, but significant differences indicate a potential issue.

Don’t stretch the fabric while measuring! Use a flexible measuring tape and ensure it’s not too tight. If adjustments are needed, blocking can often refine the shape and size. Prioritize a comfortable and flattering fit before adding buttons or finishing details.

Specific Free Patterns to Explore (as of 03/24/2026)

Explore a variety of free PDF waistcoat patterns, including ribbed, V-neck, and children’s designs, readily available for download and immediate knitting enjoyment!

Womens Rib Waistcoat (Sizes 32-38)

This classic women’s rib waistcoat pattern, available as a free PDF download, is perfect for intermediate knitters. It features a flattering silhouette and a comfortable, textured rib stitch throughout the body and front panels.

The pattern includes instructions for sizes 32 to 38, ensuring a good fit for a range of body types. Knitters will appreciate the clear, concise instructions and the opportunity to practice their ribbing technique.

Finished with buttons, this waistcoat adds a touch of vintage charm to any outfit. It’s a versatile piece that can be worn over a blouse or a simple t-shirt.

Simple V-Neck Waistcoat Pattern

For beginner to intermediate knitters, this free PDF pattern offers a stylish and straightforward V-neck waistcoat project. The design emphasizes simplicity, utilizing basic knit and purl stitches to create a clean and modern look.

The V-neckline is subtly shaped, adding a touch of elegance without excessive complexity. Instructions are clearly written, making it an excellent choice for those new to garment knitting.

This waistcoat is easily customizable with different yarn colors and button choices, allowing for a personalized finish. It’s a quick and satisfying knit!

Children’s Waistcoat Knitting Pattern

Discover adorable and practical free PDF waistcoat patterns designed specifically for children! These patterns cater to various ages and skill levels, from simple garter stitch designs for beginners to more intricate cable or textured patterns.

Creating a hand-knitted waistcoat is a wonderful way to keep little ones warm and stylish. Many patterns include detailed instructions and sizing charts to ensure a perfect fit.

Personalize these waistcoats with colorful yarns and charming buttons, making them unique and cherished handmade gifts.

Men’s Basic Waistcoat Pattern

Explore classic and versatile free PDF waistcoat patterns tailored for men. These patterns typically feature straightforward designs, often utilizing ribbing or simple stitch patterns, making them ideal for intermediate knitters.

A knitted waistcoat adds a touch of sophistication to any outfit, providing warmth without the bulk of a full jacket. Look for patterns offering a range of sizes and clear instructions.

Customize your project with preferred yarn colors and button choices for a personalized, stylish finish.

Troubleshooting Common Knitting Issues

Encountering problems? Learn to fix dropped stitches, unravel mistakes, and maintain consistent yarn tension for a flawless waistcoat knitting experience!

Dealing with Dropped Stitches

Dropped stitches are a common frustration when knitting, especially with waistcoat patterns! Don’t panic – they’re easily fixable. Use a crochet hook to carefully lift the dropped loop back onto your needle.

Alternatively, a stitch holder can temporarily secure the run, preventing further unraveling. Watch online tutorials for visual guidance; many demonstrate techniques specifically for ribbed or textured waistcoat panels.

Remember to work slowly and gently to avoid creating new ladders. Consistent tension is key to a neat repair, ensuring your finished waistcoat looks professional and polished.

Fixing Mistakes in Your Knitting

Encountering errors is part of the knitting process, even with free waistcoat patterns! Don’t be discouraged. For simple mistakes, carefully “tink” – unravel one stitch at a time – back to the error.

More complex issues might require carefully picking out rows. Use a tapestry needle to gently separate the yarn. Remember to re-knit the corrected section, maintaining consistent tension.

Online resources offer detailed tutorials on fixing various knitting mistakes. Practice makes perfect, and learning to correct errors will elevate your waistcoat projects!

Understanding Yarn Tension

Consistent yarn tension is crucial for a beautifully finished waistcoat, especially when using free PDF knitting patterns. Too tight, and your fabric will be dense and stiff; too loose, and it will be floppy and uneven.

Practice maintaining even tension as you knit. Use yarn guides or experiment with different grips to find what works best for you.

Gauge swatches, as specified in the pattern, are vital for verifying your tension matches the designer’s expectations, ensuring a well-fitting garment.

Finishing Touches & Care Instructions

Secure all yarn ends neatly, then block your knitted waistcoat to even out stitches. Hand wash gently and lay flat to dry for longevity!

Weaving in Ends

Once your waistcoat is complete, those little yarn tails need attention! Using a tapestry needle, carefully weave each end back into the knitted fabric, following the path of the stitches.

Avoid pulling too tightly, which can distort the shape. Instead, gently thread the yarn through several stitches on the wrong side, changing direction a few times for security.

Trim the yarn close to the fabric once securely woven. This creates a clean, professional finish, ensuring your beautiful waistcoat remains intact and enjoyable for years to come.

Blocking Your Knitted Waistcoat

Blocking is crucial for achieving a polished look! Gently wet your finished waistcoat – hand washing is best – and lay it flat on a blocking board or clean towel.

Shape the waistcoat to the desired dimensions, paying attention to button bands and overall symmetry. Use rustproof pins to hold the shape while it dries completely.

Blocking evens out stitches, enhances drape, and ensures your waistcoat fits beautifully. It’s a simple step that elevates your handmade garment from good to exceptional!

Washing and Caring for Your Finished Piece

Proper care extends the life of your knitted waistcoat! Hand washing in cool water with a gentle detergent is recommended, especially for delicate yarns. Avoid harsh chemicals or bleach.

Gently squeeze out excess water – do not wring – and lay the waistcoat flat to dry on a clean towel. Avoid direct sunlight or heat, which can cause fading or shrinkage.

Store your waistcoat folded flat to maintain its shape. With a little care, your beautiful, hand-knitted piece will last for years to come!

Resources for Further Learning

Expand your knitting skills with online tutorials, insightful blogs, and comprehensive books – perfect for mastering waistcoat patterns and techniques!

Online Knitting Tutorials (YouTube)

YouTube is a treasure trove for visual learners! Numerous channels offer step-by-step guidance on waistcoat knitting, from beginner basics to advanced techniques. Search for specific stitches used in free PDF patterns, like ribbing or cable work, to refine your skills.

Many knitters demonstrate entire waistcoat projects, walking you through each row and explaining potential challenges. Look for tutorials focusing on pattern reading, gauge swatching, and finishing techniques. Don’t hesitate to pause, rewind, and practice along with the instructor.

Channels like VeryPink Knits and Sheep & Stitch are excellent starting points, providing clear and concise instructions. Remember to adjust your tension and needle size based on your individual gauge!

Knitting Blogs and Websites

Knitting blogs and dedicated websites are fantastic resources beyond just free PDF patterns. They often provide in-depth articles on techniques, yarn reviews, and helpful tips for waistcoat construction. Many bloggers test patterns and offer detailed feedback, saving you potential frustration.

Explore sites like Ravelry (though it hosts patterns, its forums are blog-like), Tin Can Knits (known for beginner-friendly designs), and Purl Soho (stylish patterns and tutorials). These platforms frequently link to free resources and offer community support.

Don’t overlook independent knitting blogs – a quick search will reveal a wealth of knowledge and inspiration. They often showcase unique waistcoat variations and modifications!

Knitting Books and Magazines

While focusing on free PDF patterns, don’t dismiss the value of traditional knitting resources! Books and magazines often contain waistcoat patterns, providing professionally edited instructions and beautiful photography. They’re excellent for learning new techniques.

Look for publications specializing in garment knitting or vintage patterns – waistcoats frequently appear in these. Libraries are a cost-effective way to access a wide range of titles.

Consider investing in a comprehensive knitting stitch dictionary; it will expand your design possibilities beyond readily available patterns, allowing for customization!

Continue Reading

dodge dakota repair manual pdf free

Dodge Dakota Repair Manual PDF Free: A Comprehensive Guide

Accessing detailed repair information for your Dodge Dakota is now easier than ever with readily available PDF manuals, covering various model years and systems.

Dodge Dakota repair manuals are indispensable resources for both seasoned mechanics and DIY enthusiasts. These manuals provide a comprehensive understanding of your vehicle’s intricate systems, enabling effective troubleshooting and repair. PDF versions offer convenient access to this vital information, eliminating the need for bulky physical copies.

Whether you’re addressing routine maintenance like oil changes or tackling complex repairs such as engine overhauls, a dedicated manual guides you through each process step-by-step. They detail everything from vehicle identification numbers (VIN) decoding to parts sourcing and safety precautions.

Understanding your Dakota’s specific model year is crucial, as procedures can vary significantly. Fortunately, manuals are available catering to different generations, including those from the late 80s through the mid-2000s.

Why a PDF Repair Manual is Essential

PDF repair manuals offer unparalleled convenience and accessibility for Dodge Dakota owners. Unlike traditional paper manuals, they are easily stored on your computer, tablet, or smartphone, providing instant access whenever and wherever you need them. This digital format allows for quick searching of specific components or procedures, saving valuable time during repairs.

Furthermore, free PDF manuals democratize vehicle maintenance, empowering owners to perform repairs themselves and avoid costly mechanic fees. They contain detailed diagrams, illustrations, and step-by-step instructions, making even complex tasks manageable.

Having a manual ensures you use the correct parts and follow proper procedures, minimizing the risk of further damage or injury. They are truly essential for any Dakota owner committed to maintaining their vehicle.

Locating Free Dodge Dakota Repair Manuals Online

Finding free Dodge Dakota repair manuals requires navigating various online resources. Websites like DOKUMEN.PUB host Haynes manuals for 1987-1993 models, offering detailed tune-up guides and engine-specific sections. Dakota Durango Forums frequently share links to service manuals, including a 2000 model manual and parts manuals – remember to scroll past donation requests!

Direct PDF downloads are available from sites offering 2001 service repair manuals, covering everything from motor oil specifications to gasoline systems. Be cautious when downloading; ensure your antivirus software is up-to-date.

Always verify the manual’s applicability to your specific Dakota’s year and engine configuration for accurate repairs.

Model-Specific Repair Manuals

Dedicated repair manuals exist for different Dodge Dakota generations, providing tailored guidance for specific years and configurations, ensuring accurate maintenance and repair procedures.

1987-1993 Dodge Dakota Repair Manuals

For owners of first-generation Dodge Dakotas (1987-1993), the Haynes manual is a frequently recommended resource. This comprehensive guide, identified by ISBNs 1563920794 and 9781563920790, covers essential maintenance and repair procedures.

Contents include introductory sections on vehicle identification, parts sourcing, and safety precautions. Detailed chapters address tune-ups, four-cylinder and V6 engine repairs, cooling systems, and troubleshooting.

Specifically, the manual details booster battery jump-starting, automotive chemical usage, and provides conversion factors. It also offers guidance on jacking, towing, and routine maintenance techniques, making it a valuable asset for both novice and experienced mechanics working on these older Dakota models.

Haynes Dodge Dakota Pick-Ups Manual (1987-1993) ⸺ Details

The Haynes Dodge Dakota Pick-Ups manual (1987-1993) provides a detailed walkthrough of virtually every repair and maintenance task for these model years. It begins with essential information like vehicle identification number (VIN) decoding, helping ensure you’re working with the correct parts and procedures.

Beyond basic maintenance, the manual delves into comprehensive engine repair for both the four-cylinder and V6 options, alongside general overhaul procedures. It also covers critical systems like cooling, heating, and air conditioning, offering troubleshooting guidance.

Furthermore, it includes sections on automotive chemicals, lubricants, and crucial safety protocols, making it a complete resource for DIY repairs and extending the life of your classic Dakota.

1991-1996 Dodge Dakota Repair Manuals

For owners of Dodge Dakotas manufactured between 1991 and 1996, locating a dedicated repair manual is crucial for maintaining and repairing these vehicles. While official factory service manuals can be expensive, several sources offer downloadable PDF versions, often at no cost.

These manuals typically cover a broad spectrum of repairs, from routine maintenance like oil changes and tune-ups to more complex procedures involving the engine, transmission, and braking systems. They provide detailed diagrams, step-by-step instructions, and torque specifications.

Accessing these resources empowers owners to tackle repairs independently, saving on labor costs and ensuring the longevity of their Dakota pickup.

1997-2004 Dodge Dakota Repair Manuals

The 1997-2004 Dodge Dakota generation benefits from a wealth of online repair information, frequently available as free PDF downloads. These manuals are invaluable for both seasoned mechanics and DIY enthusiasts seeking to maintain or repair their trucks.

Comprehensive coverage includes detailed sections on engine repair (both V6 and four-cylinder options), transmission diagnostics, electrical system troubleshooting, and body work. Many resources offer specific guides for common issues encountered in these model years.

Finding these manuals often involves searching online forums and dedicated automotive websites, providing accessible repair knowledge for Dakota owners.

2000-2005 Dodge Dakota Service Manual ⸺ Free Download Sources

Locating a free service manual for the 2000-2005 Dodge Dakota is achievable through several online platforms. Dakota Durango Forums frequently host direct download links to PDF versions of the official service manuals, offering extensive repair details.

Additionally, websites specializing in automotive repair documentation often archive these manuals. Users should be cautious and verify the source’s reliability before downloading to ensure the file is safe and complete.

These manuals cover crucial systems like air conditioning, HVAC, engine mechanics, and electrical diagnostics, empowering owners to perform maintenance and repairs independently.

2001 Dodge Dakota Service Repair Manual ⸺ Specifics

The 2001 Dodge Dakota service repair manual, available as a free PDF download, provides detailed guidance for both routine maintenance and complex repairs. It encompasses vital information regarding motor oil specifications, gasoline requirements, and comprehensive system overviews.

This manual meticulously details procedures for diagnosing and resolving issues across all vehicle components, including the engine, transmission, brakes, and suspension. It’s a valuable resource for DIY mechanics and professionals alike.

Users can expect to find step-by-step instructions, diagrams, and troubleshooting charts to facilitate accurate and efficient repairs, ultimately saving time and money.

Key Areas Covered in Dodge Dakota Repair Manuals

Comprehensive guides detail engine repair, cooling systems, electrical diagnostics, braking procedures, and suspension work, ensuring thorough coverage for your Dakota’s maintenance.

Engine Repair & Maintenance

Dodge Dakota repair manuals provide extensive coverage for both four-cylinder and V6 engines, detailing procedures from basic tune-ups to complete overhauls. These resources offer step-by-step instructions, diagrams, and torque specifications crucial for successful engine work.

Manuals dissect component locations, troubleshooting guides for common issues, and detailed explanations of engine operation. You’ll find information on valve adjustments, timing belt/chain replacement, and fuel system diagnostics. Furthermore, general overhaul procedures are included, covering cylinder head removal, piston replacement, and crankshaft bearing installation.

Access to these PDFs empowers owners and mechanics alike to confidently tackle engine repairs, extending the life and performance of their Dodge Dakota.

Four-Cylinder Engine Repair

Dodge Dakota four-cylinder engine repair manuals offer detailed guidance for maintaining and fixing these powerplants. These PDFs cover essential procedures like timing belt or chain replacement, valve adjustments, and diagnosing common issues such as misfires or oil leaks.

Comprehensive sections detail cylinder head removal and installation, piston and ring replacement, and crankshaft bearing servicing. Diagrams illustrate component locations and assembly sequences, while torque specifications ensure proper tightening. Troubleshooting charts help pinpoint the source of problems quickly.

Owners can confidently perform routine maintenance like oil changes and spark plug replacements, while more advanced repairs are made accessible with clear, step-by-step instructions.

V6 Engine Repair

Dodge Dakota V6 engine repair manuals provide in-depth instructions for servicing these robust engines. These PDFs detail procedures for addressing common V6 issues, including intake manifold gasket replacement, fuel injector servicing, and diagnosing engine knocking or rough running conditions.

Detailed sections cover valve train repairs, timing chain/belt procedures, and cylinder head work. Diagrams clearly illustrate component placement and disassembly/assembly steps. Torque specifications are crucial for proper reassembly, preventing leaks and ensuring optimal performance.

Manuals also guide users through troubleshooting electrical components related to the V6 engine, such as sensors and actuators, empowering owners to tackle a wide range of repairs.

General Engine Overhaul Procedures

Comprehensive Dodge Dakota repair manuals dedicate significant sections to complete engine overhaul procedures. These guides detail the meticulous steps required for a full engine rebuild, starting with disassembly and inspection of all components.

Manuals cover cylinder boring, piston ring installation, crankshaft polishing, and valve grinding, emphasizing the importance of precision measurements and proper tooling. Detailed diagrams illustrate correct component orientation and assembly sequences.

Crucially, these PDFs outline procedures for checking clearances, verifying tolerances, and ensuring proper engine balance. They also provide guidance on selecting appropriate gaskets and seals for a reliable rebuild, maximizing engine longevity and performance.

Cooling, Heating & Air Conditioning Systems

Dodge Dakota repair manuals provide extensive coverage of the vehicle’s climate control systems. Detailed diagrams and step-by-step instructions facilitate diagnosis and repair of cooling, heating, and air conditioning components.

These PDFs outline procedures for troubleshooting issues with the radiator, water pump, thermostat, and heater core. They also cover the air conditioning system, including the accumulator, compressor, condenser, evaporator coil, and fixed orifice tube.

Manuals explain HVAC system operation, refrigerant charging, and leak detection, enabling owners and mechanics to efficiently restore optimal cabin comfort. Proper maintenance and repair guidance ensures reliable performance year-round.

Air Conditioning System Components (Accumulator, Compressor, etc.)

Dodge Dakota repair manuals dissect the air conditioning system, detailing each component’s function and repair. Comprehensive sections cover the accumulator, responsible for filtering and drying refrigerant, and the compressor, which pumps refrigerant throughout the system.

PDF guides provide detailed illustrations and procedures for diagnosing and replacing the condenser, responsible for dissipating heat, and the evaporator coil, which absorbs heat from the cabin. Information on the blower motor, hoses, and connections is also included.

These resources aid in identifying leaks, recharging the system, and understanding the role of the fixed orifice tube in regulating refrigerant flow, ensuring efficient cooling performance.

HVAC System Operation & Troubleshooting

Dodge Dakota repair manuals offer in-depth explanations of the HVAC system’s operation, from airflow control to temperature regulation. Detailed diagrams illustrate how components interact, aiding in understanding the system’s overall functionality.

Troubleshooting guides pinpoint common issues like insufficient cooling, heating problems, or unusual noises. PDF manuals provide step-by-step procedures for diagnosing faults, utilizing tools like multimeters and pressure gauges.

Specific sections cover identifying refrigerant leaks, testing compressor functionality, and resolving blower motor issues. These resources empower owners and mechanics to efficiently diagnose and repair HVAC problems, restoring comfort and functionality.

Routine Maintenance & Tune-Ups

Dodge Dakota repair manuals emphasize the importance of preventative maintenance for longevity and optimal performance. They detail scheduled service intervals for oil changes, filter replacements (air, fuel, cabin), and fluid checks – coolant, brake, power steering, and transmission.

Tune-up procedures are comprehensively outlined, including spark plug replacement, ignition timing adjustments, and fuel system cleaning. Manuals provide torque specifications and recommended parts, ensuring accurate and safe execution.

PDF versions offer convenient access to these procedures, allowing owners to perform basic maintenance tasks themselves, saving on labor costs and maintaining vehicle health. Detailed illustrations guide each step, promoting confidence and accuracy.

Electrical System Diagnostics

Dodge Dakota repair manuals provide systematic approaches to diagnosing electrical faults, crucial for resolving issues ranging from lighting problems to complex sensor malfunctions. They include detailed wiring diagrams, component locations, and testing procedures using multimeters and scan tools.

PDF manuals offer step-by-step guidance on identifying short circuits, open circuits, and faulty components like relays, fuses, and sensors. Troubleshooting charts help pinpoint the source of the problem efficiently.

Accessing these resources empowers owners and mechanics to accurately diagnose and repair electrical issues, reducing downtime and preventing further damage. Understanding the Dakota’s electrical architecture is key, and these manuals deliver that knowledge.

Braking System Repair

Dodge Dakota repair manuals offer comprehensive instructions for maintaining and repairing the braking system, ensuring safe and reliable stopping power. These guides detail procedures for inspecting brake pads, rotors, calipers, and brake lines for wear and damage.

PDF versions provide detailed diagrams illustrating component locations and assembly/disassembly steps. They cover bleeding procedures to remove air from the brake lines, crucial for optimal performance, and ABS system diagnostics.

Accessing these resources allows for confident DIY repairs or informed discussions with a mechanic. Proper brake maintenance, guided by these manuals, is vital for vehicle safety and longevity, preventing costly future repairs.

Suspension & Steering Repair

Dodge Dakota repair manuals provide detailed guidance on diagnosing and resolving issues with the suspension and steering systems, crucial for ride quality and vehicle control. These resources cover components like shocks, struts, ball joints, tie rod ends, and the steering gearbox.

PDF manuals offer step-by-step instructions for replacement procedures, torque specifications, and alignment procedures. Diagrams clearly illustrate component locations and proper installation techniques, ensuring accurate repairs.

Accessing these guides empowers owners to tackle common suspension and steering repairs, improving handling and extending component life. Proper maintenance, informed by these manuals, contributes to a safer and more comfortable driving experience.

Essential Information Found in Manuals

Comprehensive Dodge Dakota repair manuals include VIN decoding, parts lists, maintenance schedules, tool recommendations, and crucial safety precautions for effective repairs.

Vehicle Identification Numbers (VIN) Decoding

Understanding your Dodge Dakota’s Vehicle Identification Number (VIN) is paramount when utilizing a repair manual. The VIN acts as a unique fingerprint for your specific vehicle, revealing critical details about its original configuration and build specifications. Repair manuals leverage VIN decoding to ensure you’re referencing the correct procedures and parts diagrams for your Dakota.

Decoding the VIN allows identification of the engine type (four-cylinder or V6), transmission, axle ratio, and original equipment installed at the factory. This is vital for accurate troubleshooting and selecting compatible replacement parts. Manuals often include detailed VIN breakdown charts, explaining each character’s significance. Incorrect parts can lead to performance issues or even safety hazards, so precise VIN-based identification is non-negotiable for successful repairs.

Parts Identification & Sourcing

A comprehensive Dodge Dakota repair manual PDF will feature detailed parts diagrams and illustrations, crucial for accurate identification during repairs. These diagrams often utilize exploded views, showcasing how components fit together, simplifying disassembly and reassembly. Knowing the correct part number is essential to avoid ordering incorrect replacements.

Sourcing parts can be achieved through various channels: local auto parts stores, online retailers specializing in Mopar parts, and even salvage yards. The manual often provides guidance on identifying superseded part numbers – instances where a part has been updated or replaced with a newer version. Utilizing the VIN (as previously discussed) alongside the manual’s parts listings ensures compatibility and a successful repair, saving time and frustration.

Maintenance Schedules & Techniques

Dodge Dakota repair manuals, particularly in PDF format, provide meticulously detailed maintenance schedules tailored to specific model years and engine types. These schedules outline essential tasks like oil changes, filter replacements (air, fuel, cabin), fluid checks and top-offs, and spark plug replacements, all at recommended intervals.

Beyond simple checklists, the manuals detail how to perform these tasks correctly. Techniques for checking fluid levels, inspecting belts and hoses for wear, and lubricating chassis components are clearly explained, often with accompanying illustrations. Adhering to these schedules and employing the correct techniques extends the vehicle’s lifespan, maintains optimal performance, and prevents costly repairs down the road. Proper maintenance is key to reliability.

Tool & Equipment Recommendations

Dodge Dakota repair manuals in PDF format don’t just explain how to fix your truck; they also specify what you’ll need. Manuals commonly list essential tools, ranging from standard socket sets and wrenches to specialized equipment like torque wrenches, multimeters, and diagnostic scanners. They often indicate the specific sizes and types of tools required for particular jobs, preventing frustrating mid-repair interruptions.

Furthermore, manuals may recommend specific equipment for more complex tasks, such as engine compression testers or fuel pressure gauges. Safety equipment, like gloves and eye protection, is also frequently highlighted. Knowing the correct tools beforehand streamlines the repair process, ensures accurate results, and minimizes the risk of damaging components or causing injury.

Safety Precautions

Dodge Dakota repair manuals consistently emphasize safety as paramount. Before commencing any repair, disconnect the negative battery terminal to prevent accidental electrical shocks or short circuits. Always wear appropriate personal protective equipment (PPE), including safety glasses, gloves, and sturdy footwear. When working with fluids – oil, coolant, brake fluid – ensure proper ventilation and dispose of waste responsibly, adhering to local regulations.

Manuals also caution against working under a vehicle supported only by a jack; always use jack stands. Be mindful of hot engine components and exhaust systems. When dealing with fuel systems, eliminate all ignition sources. Following these precautions, detailed within the PDF guides, minimizes risks and ensures a safe repair environment for both you and your vehicle.

Additional Resources & Considerations

Supplement your repair manual with online Dodge Dakota forums for shared knowledge, troubleshooting tips, and community support from fellow enthusiasts.

Online Dodge Dakota Forums & Communities

Engaging with online Dodge Dakota communities provides a valuable supplement to your repair manual. Forums like Dakota Durango Forum offer a platform to connect with experienced owners and mechanics; These communities are treasure troves of practical advice, real-world fixes, and shared diagnostic experiences.

Users frequently post solutions to common problems, share wiring diagrams, and discuss the nuances of specific repairs. You can search existing threads for answers to your questions or create new posts seeking assistance. Beyond technical help, these forums foster a sense of camaraderie and allow you to learn from others’ successes and mistakes, ultimately enhancing your DIY repair capabilities; Remember to verify information and exercise caution when implementing advice found online.

Conversion Factors & Technical Data

Accurate repair work often necessitates converting between measurement units and referencing precise technical specifications; A comprehensive Dodge Dakota repair manual, or supplemental online resources, should include essential conversion factors – for instance, inch-pounds to Newton-meters, or gallons to liters.

Furthermore, critical technical data like torque specifications for bolts, fluid capacities for various systems (engine oil, coolant, transmission fluid), and recommended tire pressures are vital. These details ensure components are tightened correctly, fluids are filled to the proper levels, and the vehicle operates safely and efficiently. Always double-check these values before proceeding with any repair to avoid potential damage or malfunctions.

Troubleshooting Guides

Effective diagnosis is paramount when addressing vehicle issues, and a good Dodge Dakota repair manual PDF will feature detailed troubleshooting guides. These guides systematically lead you through potential causes for common problems, often utilizing flowcharts or step-by-step procedures.

They’ll help pinpoint issues ranging from engine misfires and electrical faults to brake problems and suspension noises. These guides often include symptom-based diagnostics, allowing you to identify the root cause based on what you observe. Remember to always prioritize safety and consult the manual’s safety precautions before attempting any diagnostic or repair work. Online forums can supplement these guides with real-world experiences.

Continue Reading

graphing exponential functions worksheet pdf

Exponential functions worksheets, ideal for high schoolers, focus on graphing, evaluating, and writing these functions․ They cover transformations and solving growth/decay problems․

What are Exponential Functions?

Exponential functions represent situations involving rapid growth or decay, differing from linear functions with a constant rate of change․ These functions are characterized by a variable in the exponent․ Worksheets dedicated to these functions help students grasp this core concept through practical application․ They involve identifying exponential functions from equations, graphs, and tables, distinguishing them from quadratic or linear counterparts․

Understanding these functions is crucial for modeling real-world phenomena․ The provided resources emphasize recognizing the defining features of exponential functions, preparing students for more complex problem-solving involving transformations and applications․

The General Form of an Exponential Function

The standard form of an exponential function is f(x) = a * bx, where ‘a’ is the initial value and ‘b’ is the growth or decay factor․ Worksheets often present functions in this form, requiring students to identify ‘a’ and ‘b’ to analyze the function’s behavior․ Understanding this form is fundamental for graphing and solving related problems․

These resources emphasize recognizing this structure within various equations․ Students practice manipulating equations to match this general form, solidifying their understanding․ Mastery of this form is essential for successfully completing exercises involving transformations and real-world applications found within the worksheets․

Key Components: ‘a’, ‘b’, and ‘x’

Worksheets consistently highlight the roles of ‘a’, ‘b’, and ‘x’ in f(x) = a * bx․ ‘a’ represents the initial value or y-intercept, crucial for starting the graph․ ‘b’, the base, dictates whether the function exhibits growth (b > 1) or decay (0 < b < 1)․ 'x' is the independent variable, determining the function’s output․

Exercises often involve altering these components to observe the resulting graph changes․ Students learn how modifying ‘a’ vertically shifts the graph, while changing ‘b’ affects its steepness․ Understanding these relationships is key to interpreting and solving problems presented in the exponential functions practice materials․

Understanding Exponential Growth

Worksheets demonstrate exponential growth using the formula f(x) = a(1+r)^t, focusing on problems involving increasing quantities over time․

Exponential Growth Formula: f(x) = a(1+r)^t

Worksheets heavily utilize the exponential growth formula, f(x) = a(1+r)^t, to model real-world scenarios․ Students practice identifying ‘a’ as the initial value and ‘r’ as the growth rate․ Problems often involve calculating future values based on given initial amounts and rates․

These resources emphasize applying the formula to word problems, such as population increases or compound interest․ Students learn to substitute values correctly and interpret the results within the context of the problem․ Many worksheets include exercises where students must determine the growth rate given initial and final values, requiring algebraic manipulation of the formula․

Understanding this formula is crucial for grasping the core concept of exponential growth and its applications․

Identifying Growth Rate (‘r’)

Worksheets dedicated to exponential functions frequently task students with identifying the growth rate (‘r’) from various representations․ This often involves analyzing word problems describing percentage increases or consistent multiplicative factors․ Students must convert percentages into decimal form to correctly apply them within the formula․

Exercises include extracting ‘r’ from exponential equations and interpreting its meaning in context․ Some worksheets present data tables or graphs, requiring students to calculate the growth rate based on observed changes․ A key skill is distinguishing between additive and multiplicative growth, ensuring ‘r’ represents the proportional increase․

Mastering ‘r’ identification is fundamental for accurately modeling and predicting exponential growth scenarios․

Impact of the Growth Rate on the Graph

Worksheets exploring exponential functions emphasize how the growth rate (‘r’) dramatically alters the graph’s shape․ A larger ‘r’ value signifies a steeper, more rapid increase, resulting in a curve that ascends quickly․ Conversely, a smaller ‘r’ indicates slower growth, producing a flatter curve․

Students analyze graphs to determine if the growth rate is increasing, decreasing, or constant․ Exercises often involve comparing graphs with different ‘r’ values, highlighting the visual impact․ Understanding this relationship is crucial for interpreting real-world scenarios modeled by exponential growth․

These worksheets reinforce the connection between the equation and its graphical representation․

Understanding Exponential Decay

Exponential decay worksheets help students practice solving decay problems using the formula f(x) = a(1-r)^t, and interpreting related graphs․

Exponential Decay Formula: f(x) = a(1-r)^t

Worksheets frequently utilize the exponential decay formula, f(x) = a(1-r)^t, to model real-world scenarios․ Here, ‘a’ represents the initial value, and ‘r’ signifies the decay rate expressed as a decimal․ Students practice identifying these components from word problems and applying them to calculate values at specific time intervals․

These exercises reinforce understanding of how a quantity decreases over time․ PDF resources often include problems requiring students to determine the decay rate given initial and final values․ Mastering this formula is crucial for solving problems related to radioactive decay, depreciation, and other diminishing phenomena, as presented in various exponential functions practice materials․

Identifying Decay Rate (‘r’)

Worksheets dedicated to exponential decay emphasize correctly identifying the decay rate, ‘r’․ This value, representing the percentage decrease per time period, is often presented within word problems․ Students must convert percentages into decimals before applying them to the formula f(x) = a(1-r)^t․

PDF resources commonly feature exercises where students are given initial and final values, requiring them to calculate ‘r’ through algebraic manipulation․ Understanding ‘r’ is vital for accurately modeling scenarios like depreciation or radioactive substance reduction․ Practice problems ensure students can confidently extract and utilize the decay rate from various contexts within exponential functions․

Impact of the Decay Rate on the Graph

Exponential decay worksheets demonstrate how the decay rate (‘r’) directly influences the graph’s steepness․ A larger ‘r’ value signifies a faster decrease, resulting in a more dramatic downward slope․ Conversely, a smaller ‘r’ indicates a slower decay, creating a gentler curve․

PDF exercises often ask students to compare graphs with differing ‘r’ values, reinforcing this relationship․ Visualizing the impact of ‘r’ helps solidify understanding of how exponential functions model real-world scenarios like diminishing returns․ Students learn to predict graph behavior based solely on the decay rate presented in the equation․

Graphing Exponential Functions: Step-by-Step

Worksheets guide students through creating value tables, plotting points on a coordinate plane, and connecting them to visualize the exponential function’s graph․

Creating a Table of Values

Worksheets emphasize building a table of values as a foundational step for graphing exponential functions․ Students select several ‘x’ values – both positive and negative – and substitute them into the function’s equation․ This process calculates corresponding ‘y’ values, forming ordered pairs․

These pairs are then neatly organized within the table, typically with ‘x’ in one column and ‘f(x)’ or ‘y’ in the other․ The choice of ‘x’ values is crucial; strategically selecting them, including zero, helps reveal the function’s behavior and key features, like the asymptote and intercepts․

Careful calculation and organization within the table are essential for accurate graphing and understanding the function’s characteristics․

Plotting Points on the Coordinate Plane

Worksheets guide students to transfer the ordered pairs from their table of values onto a coordinate plane․ Each pair (x, f(x)) represents a specific point․ Accurate plotting is vital; careful attention to the x and y axes ensures precision․ Students practice locating these points, developing spatial reasoning skills․

The coordinate plane provides a visual framework for understanding the function’s behavior․ As more points are plotted, a pattern begins to emerge, hinting at the curve’s shape․

Exponential function worksheets often include pre-gridded planes, simplifying the process and focusing students on accurate point placement; This step bridges the algebraic representation to a graphical one․

Connecting the Points to Form the Graph

Once plotted, worksheets instruct students to connect the points with a smooth curve, not straight lines․ This curve visually represents the exponential function․ Observing the curve’s direction – increasing or decreasing – reveals whether the function demonstrates growth or decay․

Students learn to extend the curve beyond the plotted points, understanding that exponential functions continue infinitely in both directions․

Many worksheets emphasize the importance of a smooth, continuous line, reflecting the function’s continuous nature․ Practicing this skill builds a strong visual understanding of exponential relationships․

Transformations of Exponential Functions

Worksheets explore shifts and reflections of exponential functions, aiding students in understanding how changes to the equation impact the graph’s appearance․

Vertical Shifts

Worksheets dedicated to vertical shifts demonstrate how adding or subtracting a constant to an exponential function, f(x) = a * bx + k, moves the entire graph up or down․ A positive ‘k’ value shifts the graph upwards, while a negative ‘k’ value shifts it downwards; These exercises often present students with equations and ask them to predict the shift, or provide a graph and request the equation․

Understanding this transformation is crucial for accurately sketching exponential functions and interpreting real-world scenarios modeled by them․ Practice problems frequently involve identifying the new asymptote after the vertical shift, as the horizontal asymptote also moves accordingly․ Students reinforce their knowledge by applying these concepts to solve related problems․

Horizontal Shifts

Worksheets focusing on horizontal shifts illustrate how altering the exponent within an exponential function, f(x) = a * b(x-h), translates the graph left or right․ A positive ‘h’ value shifts the graph to the right, while a negative ‘h’ value shifts it to the left․ These exercises commonly present equations and ask students to determine the direction and magnitude of the shift․

Mastering horizontal shifts is vital for accurately graphing exponential functions and interpreting their behavior․ Problems often require students to identify the new coordinates of key points after the shift․ These worksheets help solidify understanding by applying these transformations to solve practical problems and interpret graphical representations․

Reflections Across the x-axis

Worksheets dedicated to reflections across the x-axis demonstrate how multiplying an exponential function by -1, resulting in f(x) = -a * bx, creates a mirror image of the graph over the x-axis․ This transformation changes the sign of all y-values․ Students practice identifying reflected graphs and determining the new equation after the reflection․

These exercises reinforce understanding of how negative coefficients impact the graph’s orientation․ Problems often involve comparing original and reflected graphs, or determining the equation of a reflected function․ Mastering this skill is crucial for accurately interpreting and manipulating exponential functions through graphical analysis and problem-solving․

Reflections Across the y-axis

Worksheets focusing on reflections across the y-axis typically involve replacing ‘x’ with ‘-x’ in the exponential function, transforming f(x) = a * bx into f(x) = a * b-x․ This creates a mirror image of the graph across the vertical axis, altering the x-coordinates of key points․

Students practice identifying reflected graphs and determining the new equation after the transformation․ These exercises emphasize understanding how changing the input variable affects the graph’s symmetry․ Problems often require comparing original and reflected graphs or finding the equation of a reflected function, solidifying graphical analysis skills․

Domain and Range of Exponential Functions

Worksheets detail finding domains and ranges of exponential functions, often requiring students to identify these using graphs, equations, and tables․

Determining the Domain

Exponential function worksheets consistently emphasize that the domain – the set of all possible input values (x-values) – is typically all real numbers․ This stems from the fact that you can substitute any real number into an exponential expression․ However, some worksheets present scenarios with contextual limitations, like time or population, which might restrict the domain to positive numbers or a specific interval․

Students practice identifying this unrestricted domain, and occasionally, applying these real-world constraints․ The exercises often involve analyzing graphs and equations to confirm the all-real-numbers domain, or determining appropriate domain restrictions based on the problem’s context․ Understanding this foundational concept is crucial for successfully navigating more complex exponential function problems․

Determining the Range

Exponential function worksheets routinely focus on determining the range – the set of all possible output values (y-values)․ For standard exponential functions, the range is almost always all positive real numbers (y > 0)․ This is because the exponential function never actually reaches or crosses the x-axis, acting as a horizontal asymptote․

Worksheets present exercises where students analyze graphs and equations to confirm this positive range․ Some problems introduce vertical shifts, altering the asymptote and thus changing the range․ Students learn to identify these shifts and accurately define the new range․ Mastering range determination is vital for a complete understanding of exponential function behavior․

Asymptotes of Exponential Functions

Exponential function worksheets heavily emphasize understanding asymptotes – lines the graph approaches but never touches․ Typically, exponential functions have a horizontal asymptote at y = 0․ This is because as ‘x’ approaches negative infinity, the function’s value gets infinitely close to zero․

Worksheets present graphs and equations, requiring students to identify this asymptote․ Problems also explore transformations (shifts) that alter the asymptote’s position․ Students practice determining the new asymptote after vertical translations․ Recognizing asymptotes is crucial for accurately sketching exponential function graphs and interpreting their long-term behavior․

Solving Exponential Equations Graphically

Worksheets demonstrate solving exponential equations by graphing both sides and finding intersection points, visually estimating solutions for complex functions․

Finding Intercepts

Worksheets dedicated to exponential functions frequently include exercises focused on determining the y-intercept and, less commonly, the x-intercept․ Finding the y-intercept is generally straightforward; it’s achieved by setting x equal to zero in the exponential equation and solving for f(x) or y․ This directly reveals the point where the graph crosses the y-axis․

However, identifying the x-intercept—the point where the graph intersects the x-axis—often requires solving the exponential equation for x, which can be more complex and may involve logarithmic techniques․ Some worksheets provide equations where the x-intercept is easily discernible, while others present more challenging scenarios designed to reinforce problem-solving skills․

Using Graphs to Estimate Solutions

Many exponential functions worksheets incorporate graphical analysis to approximate solutions to exponential equations․ Students are presented with graphs and asked to visually identify points of intersection representing the solutions․ This method is particularly useful when analytical solutions are difficult or impossible to obtain․

The worksheets often require students to estimate the x-values corresponding to specific y-values on the graph, or vice versa, fostering a strong connection between the algebraic representation and the visual representation of exponential functions․ This skill builds a conceptual understanding beyond rote memorization of formulas․

Applications of Exponential Functions

Worksheets demonstrate real-world uses like compound interest, population growth, and radioactive decay, applying exponential function concepts to practical problem-solving scenarios․

Compound Interest Calculations

Exponential function worksheets frequently incorporate compound interest problems, allowing students to apply the formulas learned to financial scenarios․ These exercises demonstrate how initial principal amounts grow over time with varying interest rates and compounding frequencies․ Students practice calculating future values, understanding the impact of different variables on investment returns, and visualizing growth through graphing․

Worksheets often present word problems requiring students to identify the principal, rate, time, and compounding period to solve for the final amount․ This reinforces the practical application of exponential functions in personal finance and investment planning, bridging the gap between abstract mathematical concepts and real-world financial literacy․

Modeling Population Growth

Exponential function worksheets commonly feature population growth models, illustrating how populations increase over time under ideal conditions․ Students utilize the exponential growth formula to predict future population sizes, given initial populations and growth rates․ These problems often involve scenarios like bacterial growth, animal populations, or even the spread of information․

Worksheets challenge students to interpret graphs representing population growth, identify key parameters like doubling time, and analyze the impact of varying growth rates․ This application demonstrates the power of exponential functions in biological and ecological modeling, fostering a deeper understanding of dynamic systems and their mathematical representation․

Radioactive Decay Problems

Exponential function worksheets frequently incorporate radioactive decay scenarios, demonstrating how unstable isotopes diminish over time․ Students apply the exponential decay formula to calculate remaining amounts of radioactive material after specific periods, utilizing concepts like half-life․ These problems often involve real-world applications in carbon dating, medical imaging, and nuclear physics․

Worksheets challenge students to interpret decay curves, determine decay constants, and predict the time required for a substance to reach a certain level of radioactivity․ This application highlights the practical relevance of exponential functions in understanding natural processes and quantifying rates of decline, solidifying comprehension․

Exponential Functions Worksheet PDF Resources

Numerous free, printable exponential function worksheets are available online, covering graphing, transformations, and solving growth/decay problems for student practice․

Where to Find Free Printable Worksheets

Locating free, printable exponential functions worksheets is surprisingly easy with a quick online search! Many educational websites offer comprehensive collections designed for high school algebra students․ Resources frequently include worksheets focused specifically on graphing exponential functions, evaluating them from equations, and interpreting graphs․

Teachers Pay Teachers often hosts user-created worksheets, sometimes available for free, covering a wide range of difficulty levels․ Additionally, websites dedicated to math practice, like Kuta Software, provide downloadable PDFs with answer keys․ These resources typically encompass exercises on identifying exponential growth and decay, performing transformations, and applying formulas to real-world scenarios․

Types of Problems Included in Worksheets

Exponential functions worksheets commonly feature diverse problem types to reinforce understanding․ A core focus is graphing – students plot points and sketch curves from given equations․ Evaluating functions for specific ‘x’ values is also prevalent, alongside identifying key features like intercepts and asymptotes․

Worksheets often present scenarios requiring students to write exponential functions from tables or graphs; Transformation exercises—shifts, reflections, and stretches—are frequent, testing comprehension of parameter effects․ Finally, many include application problems, such as compound interest, population growth, and radioactive decay, demanding formula application and interpretation․

Using Worksheets for Practice and Assessment

Exponential functions worksheets serve as excellent practice tools, allowing students to solidify their understanding through repeated problem-solving․ They bridge the gap between theoretical knowledge and practical application, building confidence in graphing and equation manipulation․

Furthermore, these worksheets are invaluable for assessment․ Teachers can gauge student mastery of key concepts – identifying growth/decay, transformations, and solving real-world problems․ Worksheets provide a quantifiable measure of progress, informing instructional adjustments and pinpointing areas needing further review․ Regular use fosters skill development and prepares students for more advanced mathematical concepts․

Advanced Topics

Explore connections between exponential and logarithmic functions, and delve into the significance of the natural exponential function (ex)․

Logarithmic Functions and Their Relationship to Exponential Functions

Logarithmic functions are fundamentally linked to exponential functions; they represent the inverse of each other․ Understanding this inverse relationship is crucial for solving exponential equations, particularly when utilizing worksheets focused on practice; A worksheet might ask students to convert between exponential and logarithmic forms, reinforcing this core concept;

Essentially, if y = bx, then x = logby․ This allows for the isolation of variables within exponents, a common task in problem-solving․ Worksheets often include exercises requiring students to apply logarithmic properties to simplify expressions and solve for unknowns, building upon their foundational knowledge of exponential functions and their graphical representations․

Natural Exponential Functions (e^x)

The natural exponential function, ex, is a specific case where the base ‘b’ is Euler’s number (e ≈ 2․71828)․ Worksheets dedicated to this function often explore its unique properties, particularly in calculus and real-world applications like continuous growth․ Students practice graphing ex and its transformations, similar to other exponential functions, but with a focus on ‘e’ as the constant base․

These worksheets may include problems involving compound interest calculated continuously, or modeling population growth under ideal conditions․ Understanding ex is vital, and practice through dedicated exercises helps solidify comprehension of its behavior and its connection to broader exponential concepts․

Continue Reading

sure-jell instructions pdf

Sure-Jell Instructions PDF: A Comprehensive Guide

This guide delves into Sure-Jell pectin‚ offering detailed instructions for perfect preserves. The Sure-Jell instruction sheet‚ included with packages‚ ensures correct pectin‚ sugar‚ and fruit usage.

Understanding Sure-Jell Pectin

Sure-Jell pectin is a crucial ingredient for successful jam and jelly making‚ acting as a gelling agent to achieve the desired set. It’s vital to understand that pectin products are not interchangeable; always use the specific SURE-JELL product called for in your recipe to guarantee optimal results.

Pectin naturally occurs in fruits‚ but the amount varies depending on the fruit type and its ripeness. Sure-Jell provides a standardized source of pectin‚ ensuring consistent gelling‚ even with fruits lower in natural pectin. Different types of Sure-Jell are formulated for different sugar levels – regular pectin requires a full sugar amount‚ while Sure-Jell low/no-sugar pectin is designed for reduced-sugar or sugar-free recipes.

DO NOT REDUCE THE SUGAR in recipes using regular pectin‚ as this will inevitably lead to setting failures. Accurate measurement and adherence to the Sure-Jell PDF guide are paramount for achieving perfectly set jams and jellies.

The Importance of Using the Correct Pectin Type

Selecting the right Sure-Jell pectin is absolutely critical for jam and jelly success. Using the incorrect type is a primary cause of failures‚ resulting in runny preserves or inconsistent textures. Sure-Jell offers distinct pectin formulations tailored to varying sugar content in recipes.

Sure-Jell Regular Pectin demands the full sugar amount specified in the recipe; reducing sugar compromises its gelling ability. Conversely‚ Sure-Jell Low/No-Sugar Pectin is specifically engineered to work effectively with reduced sugar or sugar substitutes‚ preventing runny results.

Pectin products are not interchangeable – substituting one for another will likely lead to unsatisfactory outcomes. Always meticulously follow the product guidelines and refer to the Sure-Jell instructions PDF for precise instructions. Choosing the appropriate pectin ensures a perfect set and delicious‚ homemade preserves.

Sure-Jell Regular Pectin: Detailed Instructions

When using Sure-Jell Regular Pectin‚ adherence to the recipe is paramount. Do not reduce the sugar; it’s essential for achieving a proper gel. We recommend using Domino or C&H Pure Cane Sugar for optimal results. The included instruction sheet provides a detailed guide‚ outlining the precise method for preparing jams and jellies.

Carefully measure both fruit and sugar‚ ensuring accuracy. Add pectin to the fruit mixture before adding sugar. Bring the mixture to a full rolling boil that cannot be stirred down‚ and continue boiling for the time specified in the recipe.

Gradually adding sugar and avoiding early pectin dissolving can prevent issues. Refer to the Sure-Jell instructions PDF for precise instructions and troubleshooting tips. Following these guidelines guarantees a beautifully set jam or jelly.

Sure-Jell Low/No-Sugar Pectin: Specific Guidelines

Sure-Jell’s low/no-sugar pectin is specifically formulated for reduced-sugar recipes‚ preventing runny jams and ensuring a perfect set. This pectin requires careful adherence to the provided instructions‚ as it differs significantly from regular pectin usage. Do not attempt to substitute it directly in recipes designed for standard pectin.

Utilize sugar substitutes as directed on the package‚ understanding that the amount and type can impact the final texture. Accurate measurement is even more critical with low/no-sugar pectin. The Sure-Jell instructions PDF provides detailed guidance on appropriate sweetener ratios and boiling times.

Follow the recipe precisely‚ paying close attention to acid levels‚ as they play a crucial role in gel formation when using reduced sugar.

Essential Ingredients for Successful Jam & Jelly Making

Successful jam and jelly making hinges on the quality and accurate measurement of key ingredients. Sure-Jell pectin‚ of course‚ is paramount‚ but equally important is the sugar – Domino or C&H Pure Cane Sugar are recommended for optimal results. Do not reduce the sugar in any recipe‚ as this will almost certainly lead to setting failures.

Fruit selection is also critical; use ripe‚ but not overripe‚ fruit for the best flavor and pectin content. Acid levels‚ often adjusted with lemon juice‚ are vital for proper gel formation. The Sure-Jell instructions PDF details how to assess and adjust acidity based on the fruit used.

Proper ingredient ratios‚ as outlined in the guide‚ are non-negotiable for achieving the desired consistency and preserving quality.

Fruit Selection and Preparation

Selecting the right fruit is foundational to excellent jam and jelly. The Sure-Jell instructions PDF emphasizes using fruit that is fully ripe‚ but not overripe‚ to maximize both flavor and natural pectin levels. Damaged or bruised fruit should be avoided‚ as it can negatively impact the final product.

Preparation techniques vary depending on the fruit. Berries typically require washing and stemming‚ while larger fruits like peaches or apples need to be peeled‚ cored‚ and chopped. The guide provides specific instructions for different fruit types.

Proper preparation ensures even cooking and optimal extraction of juice and pectin. Following the Sure-Jell PDF’s guidance on fruit preparation is crucial for achieving a consistent set and preventing unwanted textures in your preserves.

Sugar Requirements: Why Accurate Measurement Matters

Accurate sugar measurement is absolutely critical when using Sure-Jell pectin. The Sure-Jell instructions PDF repeatedly stresses that DO NOT REDUCE THE SUGAR in any recipe‚ as this will inevitably lead to setting failures and a runny final product. Sugar isn’t just for sweetness; it’s a key component in the gelling process.

The guide recommends using Domino or C&H Pure Cane Sugar for consistent results. Other sugar types may contain impurities that interfere with pectin’s ability to set. Measuring sugar precisely – using dry measuring cups leveled off – is essential.

Variations in sugar quantity disrupt the delicate balance needed for proper gel formation. The Sure-Jell PDF provides detailed guidance‚ emphasizing that adhering to the specified sugar amounts is non-negotiable for successful jam and jelly making.

The Role of Acid in Jam & Jelly Setting

Acid levels significantly impact the ability of Sure-Jell pectin to create a proper gel. The Sure-Jell instructions PDF doesn’t explicitly detail acid adjustments‚ but implicitly relies on fruits naturally containing sufficient acidity. Fruits naturally low in acid‚ like some ripe peaches‚ may require lemon juice supplementation.

Pectin’s gelling ability is maximized within a specific pH range. Insufficient acid prevents the pectin from forming a firm gel‚ resulting in runny jam or jelly. Conversely‚ excessive acid can sometimes hinder the set‚ though this is less common.

The guide assumes recipes are formulated with appropriate fruit-to-acid ratios. If using a fruit known for low acidity‚ consulting additional resources for lemon juice additions is advisable to ensure a successful set‚ as detailed in the Sure-Jell PDF.

Step-by-Step Jam Making with Sure-Jell

Jam making with Sure-Jell follows a precise process‚ detailed in the Sure-Jell instructions PDF. First‚ prepare your fruit‚ crushing or chopping it according to the recipe. Accurate measurement is crucial; DO NOT REDUCE THE SUGAR‚ as this will cause setting failures.

Next‚ combine the prepared fruit with measured Sure-Jell pectin. Thoroughly mix before adding the sugar. Bring the mixture to a full rolling boil that cannot be stirred down‚ stirring constantly. This vigorous boiling is essential for activating the pectin.

Continue boiling for the time specified in the Sure-Jell PDF‚ stirring constantly. Skim off any foam that forms on the surface. Test for gel point using a saucer test. Carefully ladle hot jam into sterilized jars‚ leaving headspace‚ and process according to canning guidelines.

Preparing the Fruit Mixture

Preparing the fruit is a foundational step in successful jam making‚ as outlined in the Sure-Jell Instructions PDF. Begin with fully ripe‚ but not overripe‚ fruit. Wash the fruit thoroughly and remove any stems‚ leaves‚ or blemishes.

Depending on the fruit and recipe‚ you may need to crush‚ chop‚ or puree it. For berries‚ a gentle crushing is often sufficient. Larger fruits like peaches or plums require chopping into uniform pieces. The Sure-Jell guide emphasizes consistency in fruit preparation.

Accurate measurement of the prepared fruit is vital. Use a liquid measuring cup for best results. Remember‚ using the correct fruit-to-pectin ratio‚ as detailed in the Sure-Jell PDF‚ is key to achieving the desired gel.

Adding Pectin and Sugar Correctly

The Sure-Jell Instructions PDF stresses the critical importance of precise ingredient addition. Begin by thoroughly mixing the measured pectin with approximately ¼ cup of the sugar called for in your recipe. This prevents clumping when added to the hot fruit mixture.

Next‚ add the pectin-sugar mixture to the prepared fruit in your saucepan. Stir constantly to ensure even distribution. Do not reduce the sugar‚ as the Sure-Jell guide explicitly warns that this will lead to setting failures;

Gradually add the remaining sugar‚ stirring continuously until it’s completely dissolved. Avoid adding all the sugar at once‚ as this can hinder proper pectin activation. The Sure-Jell PDF recommends using Domino or C&H Pure Cane Sugar for optimal results.

Boiling and Achieving the Gel Point

According to the Sure-Jell Instructions PDF‚ once the pectin and sugar are combined with the fruit‚ bring the mixture to a full rolling boil that cannot be stirred down. This vigorous boil is essential for activating the pectin and achieving the necessary gel point.

Continue boiling for the time specified in your recipe – typically one minute. Stir constantly to prevent sticking and ensure even heat distribution. The Sure-Jell guide emphasizes consistent stirring throughout this process.

To test for the gel point‚ use the spoon test: dip a chilled spoon into the boiling mixture‚ then lift and turn it. If the liquid sheets off the spoon instead of dripping‚ the gel point has been reached. If not‚ continue boiling for another minute and retest. Precise timing and a strong boil are key to success‚ as detailed in the Sure-Jell PDF.

Step-by-Step Jelly Making with Sure-Jell

The Sure-Jell Instructions PDF outlines a precise process for jelly making‚ beginning with extracting clear fruit juice. Strain the juice through several layers of cheesecloth to remove pulp‚ ensuring a brilliantly clear final product. Accurate juice measurement is crucial‚ as detailed in the Sure-Jell guide.

Combine the measured juice with the specified amount of Sure-Jell pectin in a large saucepan. Stir well to dissolve the pectin completely. Add sugar according to the recipe‚ remembering DO NOT REDUCE THE SUGAR‚ as this will impact the set.

Bring the mixture to a full rolling boil‚ stirring constantly‚ and boil for the time indicated in the recipe – usually one minute. Test for the gel point using the spoon test‚ as described in the Sure-Jell PDF‚ to confirm a perfect jelly consistency.

Extracting Fruit Juice

The Sure-Jell Instructions PDF emphasizes the importance of clear juice for successful jelly making. Begin by washing and crushing your chosen fruit – apples‚ grapes‚ or berries work wonderfully. Place the crushed fruit into a jelly bag or several layers of dampened cheesecloth.

Suspend the bag over a bowl‚ allowing the juice to drip naturally. Avoid squeezing the bag‚ as this will result in cloudy jelly due to pulp and sediment. Patience is key; natural dripping yields the clearest juice‚ as detailed in the Sure-Jell guide.

For fruits like apples‚ gentle heating can aid juice extraction. Measure the extracted juice accurately‚ as precise measurements are vital for proper pectin and sugar ratios‚ ensuring a perfect set. Refer to the Sure-Jell PDF for specific fruit juice yield expectations.

Combining Juice‚ Pectin‚ and Sugar

The Sure-Jell Instructions PDF stresses a specific order for combining ingredients. First‚ measure the prepared fruit juice accurately into a large‚ heavy-bottomed saucepan. Then‚ add the measured amount of Sure-Jell pectin to the juice‚ stirring constantly to ensure it dissolves completely – avoid clumping!

Next‚ according to the Sure-Jell guide‚ gradually add the required amount of sugar‚ continuing to stir. Do not reduce the sugar‚ as this is critical for achieving the proper gel. Using Domino or C&H Pure Cane Sugar is recommended for consistent results.

Bring the mixture to a full rolling boil‚ stirring constantly‚ as outlined in the Sure-Jell PDF. This initial combination and boiling stage are crucial for activating the pectin and creating the foundation for a perfect jelly.

Cooking to the Jelly Stage

The Sure-Jell Instructions PDF emphasizes achieving a full rolling boil – one that doesn’t stop bubbling even when stirred – for the specified time. Continue stirring constantly during this process to prevent sticking and ensure even heat distribution. Accurate timing‚ as detailed in the Sure-Jell guide‚ is paramount for proper setting.

To test for the jelly stage‚ the Sure-Jell PDF recommends the classic chilled spoon test. Place a small spoonful of the hot jelly onto a chilled plate and return it to the freezer for 30 seconds. Push the jelly with your finger; if it wrinkles and forms a skin‚ it has reached the gel point.

If it hasn’t set‚ continue boiling for a short period and retest. Remember‚ following the Sure-Jell instructions precisely is key to avoiding a runny final product.

Troubleshooting Common Jam & Jelly Problems

The Sure-Jell Instructions PDF offers solutions for common issues. Runny jam often results from inaccurate measurements‚ particularly reducing sugar‚ as the Sure-Jell guide explicitly warns against. Re-boiling with additional pectin‚ as suggested in the Sure-Jell PDF‚ can sometimes salvage a failed batch.

Crystallization‚ where sugar grains form‚ can occur if sugar wasn’t dissolved adequately or if too much sugar was added initially. Gradual sugar addition‚ as outlined in the Sure-Jell instructions‚ helps prevent this.

Mold growth is a safety concern. Proper sterilization of jars and lids‚ detailed in the Sure-Jell PDF‚ is crucial for prevention. Discard any batch showing signs of mold. The Sure-Jell resources emphasize following all safety guidelines for home canning.

Runny Jam: Causes and Solutions

Runny jam is a frequent frustration‚ often stemming from improper sugar levels. The Sure-Jell Instructions PDF strongly emphasizes not reducing the sugar in recipes‚ as this directly impacts the set. Using the correct amount of Domino or C&H Pure Cane Sugar‚ as recommended‚ is vital.

Incorrect pectin type is another culprit. Sure-Jell offers regular and low/no-sugar pectin; using the wrong one leads to failures. The Sure-Jell PDF guide clarifies which pectin suits each recipe.

If your jam doesn’t set‚ the Sure-Jell instructions suggest re-boiling. Add more pectin‚ following the PDF’s guidance‚ and boil again. Accurate measurement and adherence to the Sure-Jell instructions are key to achieving the desired consistency.

Crystallization in Jam & Jelly

Crystallization‚ the formation of sugar crystals‚ can occur in homemade jams and jellies. The Sure-Jell Instructions PDF doesn’t directly address prevention‚ but proper technique minimizes the risk. Adding sugar gradually‚ as detailed in the Sure-Jell PDF guide‚ is crucial.

Avoiding early pectin dissolving also helps. Follow the Sure-Jell instructions precisely regarding when to add pectin and sugar during the boiling process. Using high-quality sugar‚ like Domino or C&H Pure Cane Sugar‚ contributes to a smoother texture.

While not a failure‚ crystallization affects texture. The Sure-Jell resources suggest that while undesirable‚ crystallized jam remains safe to consume. Careful adherence to the Sure-Jell Instructions PDF is the best defense against this issue.

Mold Growth: Prevention and Safety

Mold growth in home-canned jams and jellies is a serious concern‚ and the Sure-Jell Instructions PDF emphasizes preventative measures. Proper sterilization of jars and lids‚ detailed in the guide‚ is paramount. Following Sure-Jell’s canning techniques ensures a secure seal‚ preventing contamination.

The Sure-Jell PDF stresses the importance of a proper seal; any failures must be addressed immediately. If mold is detected‚ the entire jar’s contents should be discarded for safety. Do not attempt to salvage moldy jam or jelly.

The Sure-Jell resources highlight that proper processing times‚ as outlined in the guide‚ are critical for eliminating yeasts and molds. Always refer to the Sure-Jell Instructions PDF for the most up-to-date safety recommendations and canning procedures.

Accessing the Sure-Jell Instructions PDF

The Sure-Jell Instructions PDF guide is readily available online through official sources‚ providing convenient access to detailed jam and jelly-making instructions. The Sure-Jell website offers a direct download link for the comprehensive guide‚ ensuring users have the latest information at their fingertips.

Downloading and saving the PDF allows for offline access‚ making it a valuable resource in the kitchen. This ensures you always have the correct procedures‚ even without an internet connection. The Sure-Jell website resources are designed for easy navigation and quick access to essential canning information.

Users can easily find the Sure-Jell Instructions PDF by searching the official website or utilizing direct links provided in related articles. Having this guide readily available promotes successful and safe home canning practices.

Official Sure-Jell Website Resources

The official Sure-Jell website serves as a central hub for all things pectin‚ offering a wealth of resources for both novice and experienced jam and jelly makers. Beyond the downloadable Sure-Jell Instructions PDF‚ the site features a comprehensive recipe collection tailored to different pectin types and fruits.

Users can find detailed information on pectin science‚ troubleshooting guides for common canning issues‚ and frequently asked questions. The website emphasizes the importance of using the correct Sure-Jell product for each recipe‚ highlighting that pectin products are not interchangeable.

Furthermore‚ the site provides updates on recent recipe mix-ups and corrected instructions‚ ensuring users have access to the most accurate information. Sure-Jell prioritizes safety and offers guidance on proper canning techniques and sterilization procedures‚ promoting successful and safe preserving.

Downloading and Saving the PDF Guide

Accessing the Sure-Jell Instructions PDF is straightforward through the official Sure-Jell website. Typically‚ the PDF is readily available on recipe pages or within a dedicated “Support” or “Resources” section. Users simply need to click the download link‚ and the guide will be saved to their device.

It’s recommended to save the PDF to a readily accessible folder‚ such as “Documents” or a dedicated “Canning” folder‚ for easy reference during jam and jelly making. Ensuring you have the latest version is crucial‚ especially considering past instruction mix-ups. Regularly check the website for updates.

Downloading and saving the guide allows offline access‚ which is particularly useful in kitchens with limited internet connectivity. Having a digital copy ensures you always have the detailed‚ step-by-step instructions at your fingertips‚ promoting successful preserving.

Recent Recipe Mix-Ups & Corrected Instructions

Recent issues highlighted a significant problem: incorrect recipes were mistakenly inserted into boxes of Sure-Jell Regular Pectin‚ specifically affecting strawberry freezer jam recipes. This resulted in many home canners experiencing failures‚ with their jam refusing to set properly. The error underscored the importance of verifying instructions.

Sure-Jell has addressed this by providing corrected instructions on their official website and through updated PDF guides. Consumers who purchased affected pectin are urged to download the latest version to ensure successful results. The company emphasizes that using the wrong recipe can lead to significant setbacks.

This incident serves as a reminder to always double-check instructions‚ even with trusted brands. The corrected PDF guide provides accurate measurements and procedures‚ preventing future issues and guaranteeing perfectly set jams and jellies. Staying informed about these updates is vital for home canning success.

Safety Considerations for Home Canning

Home canning requires strict adherence to safety protocols to prevent spoilage and potential health risks. Proper sterilization of jars and lids is paramount‚ eliminating bacteria that could contaminate the preserves. The Sure-Jell PDF guide emphasizes this crucial step‚ detailing effective sterilization methods.

Following proper canning techniques‚ such as maintaining adequate headspace and processing times‚ is essential for creating a vacuum seal. A failed seal can lead to mold growth and foodborne illness. The guide provides clear instructions on identifying and addressing seal failures.

Mold prevention involves using fresh‚ high-quality ingredients and adhering to sanitary practices throughout the process. Always inspect jars before consumption‚ discarding any showing signs of spoilage. Prioritizing safety ensures delicious and worry-free homemade jams and jellies.

Sterilizing Jars and Lids

Sterilizing jars and lids is a critical safety step in home canning‚ preventing bacterial contamination and ensuring a proper seal. The Sure-Jell Instructions PDF provides detailed guidance on effective sterilization methods. Jars can be sterilized by boiling them for ten minutes‚ or by running them through a dishwasher cycle with a sanitize option;

Lids require a slightly different approach. While not boiled‚ they should be heated in simmering water (not boiling) to soften the sealing compound. The PDF stresses the importance of following these specific instructions for lids‚ as boiling can damage the sealing ring.

Maintaining a clean work environment is also vital during sterilization. Ensure jars are handled with clean utensils and placed on a sanitized surface. Proper sterilization‚ as outlined in the Sure-Jell guide‚ is fundamental to safe and successful jam and jelly making.

Proper Canning Techniques

Proper canning techniques‚ detailed within the Sure-Jell Instructions PDF‚ are essential for preserving your homemade jams and jellies safely. The guide emphasizes the importance of using a boiling water bath canner‚ ensuring jars are fully submerged in boiling water for the recommended processing time.

Headspace – the space between the jam/jelly surface and the jar lid – is crucial. The PDF specifies the correct headspace for different recipes‚ typically ¼ inch. Incorrect headspace can lead to seal failures. After processing‚ allow jars to cool undisturbed for 12-24 hours to allow a vacuum seal to form.

The Sure-Jell guide also highlights the importance of carefully removing lids after cooling and checking for a proper seal – the lid should be concave and not flex when pressed. Following these techniques guarantees a delicious and safely preserved product.

Understanding Seal Failures

The Sure-Jell Instructions PDF addresses potential seal failures in home canning‚ a common concern for beginners. A failed seal means the jar didn’t create a vacuum‚ potentially leading to spoilage. Common causes include improper headspace‚ nicks in the jar rim‚ or insufficient processing time.

The guide explains how to test for a seal: press the center of the lid; if it flexes‚ the jar isn’t sealed. Unsealed jars should be refrigerated immediately and consumed within a few weeks‚ or reprocessed with new lids within 24 hours.

The PDF stresses the importance of inspecting jars carefully before and after processing. Properly sealed jars are essential for long-term storage and food safety. Understanding these failures‚ and the solutions provided in the Sure-Jell guide‚ ensures a safe and enjoyable canning experience.

Continue Reading