timex owners manual

Timex Owners Manual: A Comprehensive Guide

Welcome! This detailed manual unlocks the full potential of your Timex watch, offering comprehensive guidance on features and operation, starting today, April 28, 2026.

Congratulations on selecting a Timex timepiece! This manual serves as your complete resource for understanding and maximizing the functionality of your new watch. Whether you’ve chosen an Expedition, a classic analog model, or a cutting-edge hybrid smartwatch, Timex delivers reliable timekeeping and innovative features.

This guide is designed for all Timex owners, from first-time users to seasoned watch enthusiasts. We’ll cover everything from basic operation – setting the time and date – to exploring advanced features like chronograph functions, Indiglo night-light technology, and alarm settings.

Specifically, this manual references information applicable to models like the 1T2312 and digital activity trackers (02448_PK23), ensuring broad compatibility. We aim to provide clear, concise instructions, empowering you to fully enjoy your Timex watch for years to come. Let’s begin unlocking its value!

Understanding Timex Watch Types

Timex offers a diverse range of watches to suit every lifestyle and preference. This section provides an overview of the primary categories: Analog, Digital, and Hybrid Smartwatches. Analog watches feature traditional hour and minute hands, often with additional sub-dials for features like chronographs or date displays. They represent classic timekeeping elegance.

Digital watches utilize an electronic display to show the time, and frequently include additional functions like alarms, timers, and stopwatches. These are known for their practicality and ease of use.

Hybrid Smartwatches blend the aesthetic of an analog watch with smart features like activity tracking and notifications, offering a balance between style and technology. Understanding your watch type is crucial for navigating the specific instructions within this manual, ensuring optimal performance and enjoyment of your Timex product.
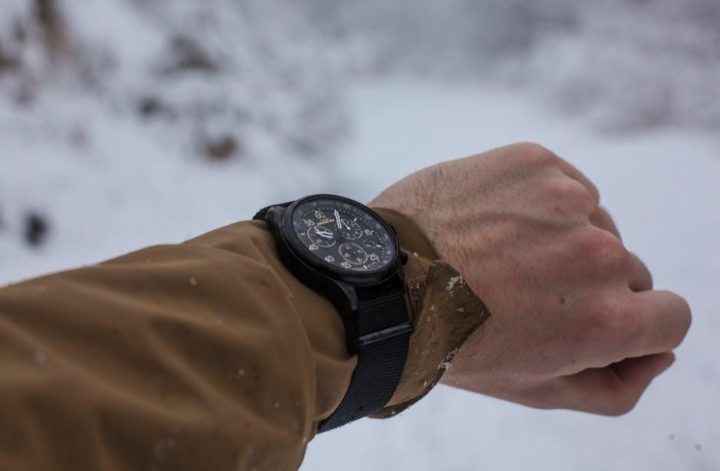
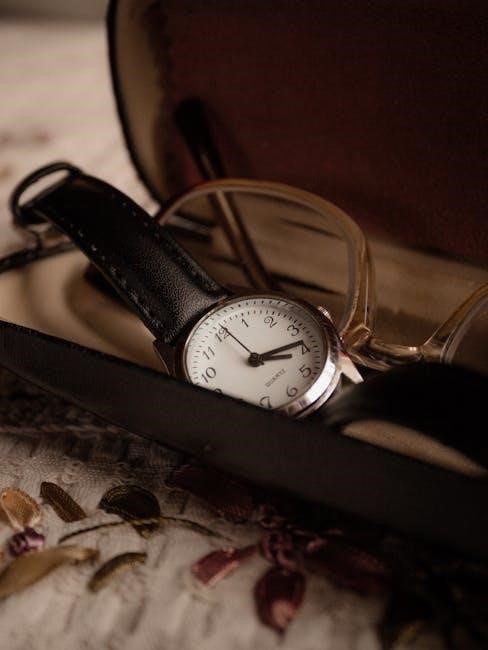
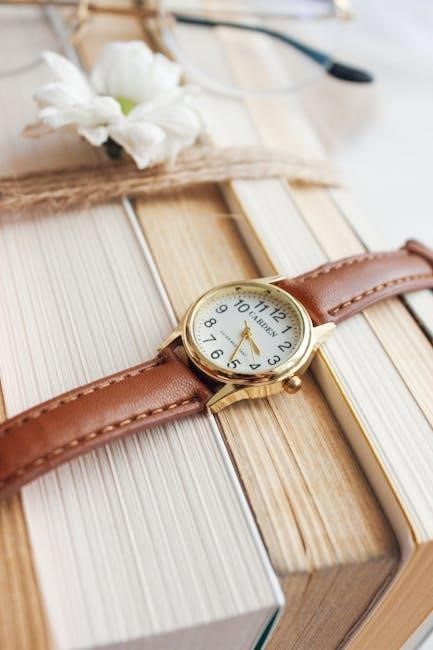
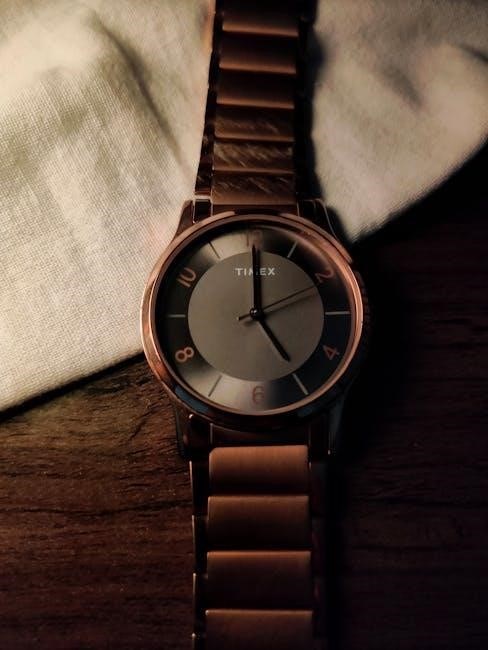
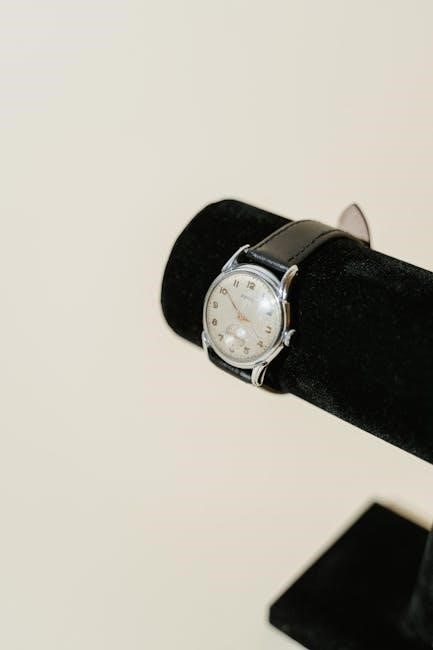
Analog Watches

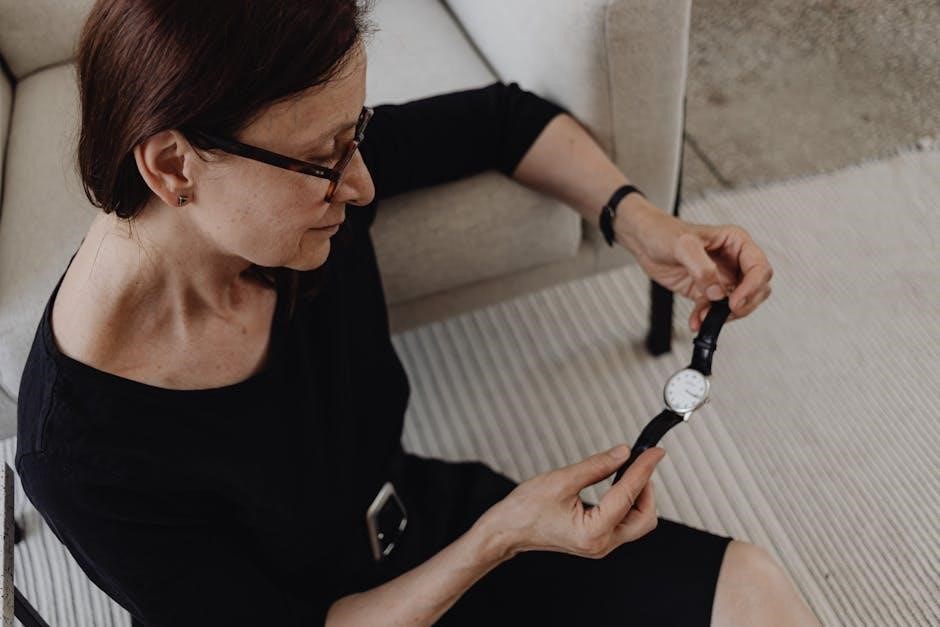
Timex analog watches represent a timeless tradition of craftsmanship and style. These watches utilize hour and minute hands to display the time on a traditional dial. Many models include a seconds hand and additional sub-dials for features like date, day, or chronograph functionality. Setting the time typically involves gently pulling the crown (the small knob on the side) to the appropriate position.

Rotating the crown adjusts the hands until the correct time is displayed. Ensure the date and day (if applicable) are also correctly set. Analog watches often require periodic winding (for automatic movements) or battery replacement (for quartz movements) to maintain accurate timekeeping. Proper care, including avoiding strong magnetic fields and impacts, will prolong the life of your Timex analog watch.

Digital Watches

Timex digital watches offer a modern and functional approach to timekeeping. These watches display the time numerically using an LCD or LED screen. Digital models often incorporate a wide range of features, including alarms, timers, stopwatches, and multiple time zones. Setting the time on a digital watch typically involves pressing and holding specific buttons on the watch case.

Navigating the menu system allows you to adjust the hours, minutes, seconds, and date. Digital watches are powered by batteries, and the battery life varies depending on usage and features. Regularly check the battery indicator and replace it when necessary. Digital activity trackers, like the 02448_PK23, are also included in this category, offering fitness tracking alongside timekeeping.

Hybrid Smartwatches

Timex hybrid smartwatches seamlessly blend the classic aesthetic of traditional timepieces with the intelligent functionality of modern smart technology. These watches typically feature analog hands displaying the time, combined with hidden smart features accessible through button presses or a connected smartphone app. They often track activity levels like steps, calories burned, and sleep patterns.

Hybrid models offer notifications for calls, texts, and social media alerts, delivered via subtle vibrations or hand movements. Battery life is significantly longer than full smartwatches, often lasting several months on a single charge. Synchronization with the Timex Connected app is crucial for customizing settings and viewing tracked data. These watches represent a balance between style, convenience, and extended battery performance.

Key Features Across Timex Models

Timex watches are renowned for their durability, reliability, and innovative features. A cornerstone of many models is water resistance, ranging from splash resistance to suitability for swimming and diving – understanding the ATM rating is crucial. The iconic Indiglo night-light provides superior illumination in low-light conditions, enhancing readability. Many Timex watches boast chronograph functionality, allowing precise timing of events with start, stop, and reset capabilities.

Furthermore, convenient date and day display settings are standard on numerous models, simplifying daily organization. These features, combined with robust construction, make Timex a trusted choice for everyday wear and adventurous pursuits. Exploring these core functionalities will enhance your overall Timex experience.

Water Resistance Explained

Timex water resistance is measured in atmospheres (ATM), indicating the pressure a watch can withstand. Splash resistance (typically 30M/3ATM) protects against minor splashes, but isn’t suitable for immersion. 50M/5ATM watches are ideal for swimming, showering, and light water activities. However, prolonged submersion should be avoided.

100M/10ATM and higher ratings are designed for snorkeling and recreational diving, but professional diving requires specialized equipment. It’s crucial to remember that water resistance isn’t permanent and can diminish over time due to aging seals or impact damage. Avoid operating the crown or pushers underwater, and rinse your watch with fresh water after exposure to saltwater.

Indiglo Night-Light Functionality

Timex’s signature Indiglo night-light provides superior illumination in low-light conditions. To activate, press and hold the designated button – typically the crown or a side button – until the dial glows a cool blue. The duration of illumination varies by model, but generally lasts several seconds.

Indiglo technology uses electroluminescent material, offering even and consistent brightness across the entire watch face. It’s energy-efficient, minimizing battery drain. Avoid prolonged or frequent activation to conserve power. Note that the intensity of the Indiglo light may diminish over time with extended use, but it remains a reliable feature for nighttime visibility.

Chronograph Features & Usage

Timex chronographs allow precise measurement of elapsed time, independent of the watch’s primary timekeeping function. Typically, a chronograph features start/stop and reset buttons. Pressing the start/stop button initiates timing; press again to halt it. The reset button returns the chronograph hands to zero.

Sub-dials often indicate seconds, minutes, and sometimes hours elapsed. Some models feature a flyback function, allowing you to restart the timer without resetting to zero. Understanding your specific model’s layout is crucial. Chronograph accuracy depends on regular maintenance and proper button operation. Familiarize yourself with the button placement and function for optimal use during activities requiring precise timing.

Date and Day Display Settings

Adjusting the date and day on your Timex watch varies depending on the model – analog or digital. For many analog watches, locate the crown and pull it out to the first or second position; Rotating the crown will cycle through the date and day displays. Ensure you set the correct date and day before proceeding. Digital watches typically require pressing and holding a ‘Mode’ or ‘Set’ button to access date/day settings.

Carefully consult your specific model’s instructions, as some Timex watches feature quick-set date functions. Always avoid changing the date during the hours of 9 PM to 3 AM, as this can damage the movement. Proper setting ensures accurate time and date representation, enhancing your watch’s functionality.

Setting Up Your Timex Watch

Initial setup is crucial for optimal performance. Begin by identifying your Timex watch type – analog, digital, or hybrid. The process differs significantly between these categories. Analog watches generally involve unwinding the crown, setting the correct time by rotating it, and then pushing it back in to secure the setting. Digital watches require pressing and holding mode buttons to enter setting mode, then using other buttons to adjust hours, minutes, and date.

Refer to the specific instructions for your model, as variations exist. Ensure the date and day are correctly set alongside the time. Proper setup guarantees accurate timekeeping and allows you to fully utilize all features your Timex watch offers, enhancing your overall experience.

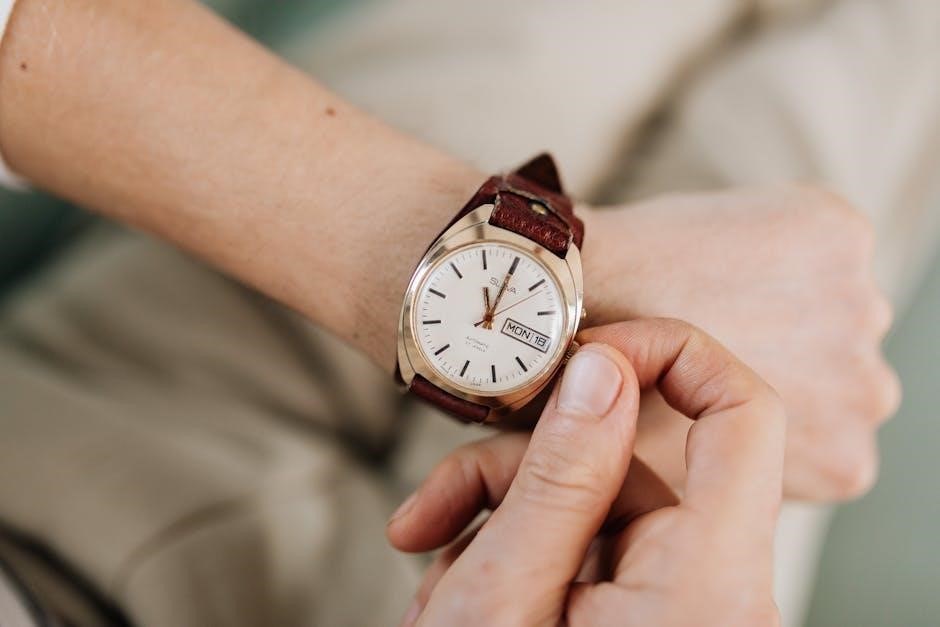
Setting the Time (Analog Watches)

To set the time on your analog Timex watch, gently pull the crown out to the first position. This disengages the time-setting mechanism. Rotate the crown clockwise to advance the hands to the desired time. Pay close attention to whether it’s AM or PM, ensuring accurate time representation. If your watch features a date function, rotating the crown in the opposite direction might adjust the date.

Once the correct time is set, carefully push the crown back into its original position. Ensure it’s fully seated to maintain water resistance and prevent accidental time adjustments. A slight click usually indicates proper engagement. Regularly check your watch’s time against a reliable source to maintain accuracy.

Setting the Time (Digital Watches)

Setting the time on your Timex digital watch typically involves using the buttons on the case; Press and hold the ‘Mode’ or ‘Set’ button until the digits representing hours begin to flash. Use the ‘Start/Stop’ or ‘Light’ buttons to increase the hour value until the correct hour is displayed. Then, press ‘Mode’ or ‘Set’ again to move to the minutes, and adjust them similarly.

Confirm your settings by pressing ‘Mode’ or ‘Set’ one final time. Ensure you’ve selected the correct AM or PM designation if your watch uses a 12-hour format. Familiarize yourself with your specific model’s button layout, as it can vary. Regularly synchronizing your digital watch with a time source ensures accuracy.

Setting the Date (Analog & Digital)

Adjusting the date on your Timex watch depends on whether it’s analog or digital. For analog watches, gently pull the crown out to the first or second position (refer to your model’s specifics). Rotate the crown to set the date, ensuring the correct day and month are displayed. Push the crown back in to secure the setting.

Digital watches usually require entering a ‘Setting’ mode, often accessed by pressing and holding the ‘Mode’ or ‘Set’ button. Navigate to the date display using the same button, then use ‘Start/Stop’ or ‘Light’ to adjust the month, day, and year. Confirm your changes by pressing ‘Mode’ or ‘Set’ again. Always double-check the date after setting!

Using Specific Timex Functions

Timex watches often boast versatile functions beyond basic timekeeping. Explore the alarm feature by accessing the ‘Setting’ mode, typically via a prolonged press of the ‘Mode’ or ‘Set’ button. Configure the desired alarm time and enable it; a distinct sound will alert you. The timer function, also found in ‘Setting’ mode, allows you to set countdown durations for various activities.

For fitness tracking, utilize the stopwatch feature – press ‘Start/Stop’ to begin timing, and again to pause or reset. Digital activity trackers, like the 02448_PK23, offer additional features accessed through the user guide. Mastering these functions enhances your Timex experience, providing practical tools for daily life and beyond.

Alarm Setting and Operation

Setting the alarm on your Timex watch typically involves entering the ‘Alarm Set’ mode, often accessed by pressing and holding the ‘Mode’ or ‘Set’ button. Once in this mode, use the buttons to adjust the hour and minutes for your desired alarm time. Confirm your selection, usually by pressing ‘Set’ again, and ensure the alarm icon is displayed on the watch face to indicate it’s active.

Operation is straightforward: when the alarm time is reached, an audible alert will sound. To dismiss the alarm, press any button. Some models offer a ‘snooze’ function, providing a brief respite before the alarm repeats. Refer to your specific model’s guide for detailed instructions, as procedures can vary slightly.

Timer Functionality & Applications

The timer function on your Timex watch is a versatile tool for tracking elapsed time. Access the timer mode, usually via the ‘Mode’ button, and set your desired countdown duration using the start/stop and lap/reset buttons. The display will then show the remaining time, counting down to zero.

Applications are numerous: use it for timing workouts, cooking, parking durations, or any activity requiring precise time monitoring. Some Timex models allow multiple timer presets for frequently used durations. Remember to consult your specific model’s manual for detailed instructions on starting, pausing, resuming, and resetting the timer. Proper use enhances convenience and efficiency.

Stopwatch Operation & Resetting

The stopwatch function accurately measures elapsed time from a starting point. Initiate the stopwatch by pressing the ‘Start/Stop’ button; the display will begin counting upwards in seconds, minutes, and hours. Pressing the same button again pauses the timing. Utilize the ‘Lap/Reset’ button to record split times without stopping the overall measurement – perfect for tracking intervals.

Resetting the stopwatch returns the display to zero. Typically, this is achieved by pressing the ‘Lap/Reset’ button while the stopwatch is paused. Some models may require a long press. Familiarize yourself with your specific Timex model’s procedure. Consistent and accurate timing relies on understanding these simple operational steps, enhancing its utility for athletic or timing needs.

Maintaining Your Timex Watch

Regular maintenance ensures your Timex watch continues to perform reliably for years. Protect your investment with careful attention to cleaning and care. Avoid exposing your watch to extreme temperatures, harsh chemicals, or strong magnetic fields, as these can damage internal components.

Cleaning should be done with a soft, damp cloth. For stubborn dirt, a mild soapy water solution is acceptable, but ensure the watch is thoroughly dried afterward. Periodically inspect the strap or bracelet for wear and tear; replacement is recommended when damage is detected. Battery replacement, when needed, should ideally be performed by a qualified watch technician to preserve water resistance and functionality.

Battery Replacement Procedures

Replacing the battery in your Timex watch often requires specialized tools and expertise. While some models allow for user replacement, it’s generally recommended to have a qualified watch technician perform this task. Incorrect procedures can compromise the watch’s water resistance and potentially damage the movement.

If attempting self-replacement, ensure you have the correct battery type specified for your model. Carefully open the watch case back, noting the orientation of the battery and any gaskets. Remove the old battery and install the new one, ensuring proper polarity. Re-seal the case back securely, paying close attention to gasket alignment to maintain water resistance. Improper sealing can lead to moisture damage.

Cleaning and Care Instructions

Maintaining your Timex watch’s appearance and functionality requires regular cleaning and careful handling. To clean the case and strap, use a soft cloth dampened with lukewarm water. Avoid harsh chemicals, solvents, or abrasive cleaners, as these can damage the finish and seals. For metal bracelets, a soft brush can help remove dirt from the links.

Leather straps should be cleaned with a leather-specific cleaner and conditioner to prevent drying and cracking. Avoid exposing your watch to extreme temperatures, strong magnetic fields, or direct sunlight for prolonged periods. Regularly check the crown and pushers to ensure they are securely fastened, protecting against water ingress. Proper care extends the life of your Timex timepiece.

Strap Replacement Guide

Replacing your Timex watch strap is a straightforward process that can refresh its look. First, carefully remove the spring bars connecting the strap to the watch case using a spring bar tool. Gently compress the spring bar and maneuver it out of the hole.

Align the new strap with the watch lugs and carefully insert the spring bars, ensuring they click securely into place on both sides. Verify the strap is firmly attached before wearing. For nylon or fabric straps, simply unthread the old strap and thread the new one through the lugs. Always use straps compatible with your Timex model for a secure fit and optimal performance.

Troubleshooting Common Issues

Experiencing issues with your Timex? Here’s a quick guide to resolve common problems. If your watch isn’t keeping accurate time, check the battery and ensure it’s properly set according to the instructions. For Indiglo night-light failures, verify the button is functioning and the watch has sufficient power.

Button malfunctions often indicate a need for cleaning or potential internal issues. Try gently cleaning around the buttons. If problems persist, consult the warranty information. Remember, attempting self-repair beyond basic troubleshooting may void your warranty. For persistent issues, seeking professional assistance is recommended to maintain your Timex’s functionality.

Watch Not Keeping Accurate Time

Is your Timex losing or gaining time? Several factors can contribute to inaccurate timekeeping. First, ensure the watch is properly set, referencing a reliable time source. For quartz watches, a low battery is a frequent culprit; consider a battery replacement. Mechanical watches require periodic servicing and may deviate slightly, but significant inaccuracies warrant professional attention.

External factors like strong magnetic fields or physical shocks can also affect accuracy. Avoid exposing your watch to these conditions. If the issue persists after checking these points, consult a qualified watch technician for diagnosis and repair. Regular maintenance is key to maintaining precise timekeeping.

Indiglo Not Working

Experiencing issues with your Timex’s signature Indiglo night-light? The most common cause is a depleted battery. Replacing the battery often resolves this issue. Ensure you’re pressing the Indiglo button firmly and holding it long enough – a quick tap may not activate the feature. Check for any debris or obstructions around the button that might hinder its function.

If the problem persists, there might be an internal connection issue requiring professional repair. Avoid attempting to disassemble the watch yourself, as this could void your warranty. A qualified technician can diagnose and fix the problem efficiently, restoring the convenient illumination of your Timex watch.

Button Malfunctions

Encountering unresponsive or erratic button behavior on your Timex watch? First, ensure the buttons aren’t physically stuck due to dirt or debris. Gently clean around the buttons with a soft, dry cloth. If a button feels jammed, avoid forcing it; this could cause further damage. A common issue is a low battery, which can sometimes cause intermittent button functionality.

Should the problem continue after a battery replacement, there may be an internal issue with the button mechanism or the watch’s circuitry. Attempting self-repair is strongly discouraged. Contact Timex customer support or a qualified watch repair technician for diagnosis and repair to avoid potentially voiding your warranty and ensure proper functionality.

Timex Warranty Information

Your Timex watch is warranted against manufacturing defects to the original purchaser for a period of one year from the date of purchase. This warranty covers defects in materials and workmanship under normal use. It does not cover damage resulting from accidents, misuse, or unauthorized repairs. The warranty is void if the watch has been opened or tampered with by anyone other than an authorized Timex service center.

To make a warranty claim, retain your original purchase receipt as proof of date and location of purchase. Contact Timex customer support to obtain a Return Merchandise Authorization (RMA) number and shipping instructions. Timex will, at its discretion, repair or replace the defective watch. This warranty gives you specific legal rights, and you may have other rights which vary by location.

Finding Additional Support & Resources

For further assistance beyond this manual, Timex offers a wealth of online resources and dedicated customer support channels. Visit the official Timex website at www.timex.com to access a comprehensive FAQ section, downloadable manuals for various models, and troubleshooting guides. You can also explore the Timex community forum to connect with other users and share experiences.

Direct customer support is available via phone and email. Contact information can be found on the Timex website under the “Support” section. Timex also maintains an active presence on social media platforms, providing updates, answering questions, and offering assistance. Explore these channels for quick solutions and to stay informed about new products and features.

Continue Reading

sage 200 user guide

Sage 200 is a comprehensive ERP solution designed for medium-sized businesses. It streamlines operations,
enhancing financial control and providing robust reporting capabilities, as noted in recent discussions.

What is Sage 200?

Sage 200 is a powerful Enterprise Resource Planning (ERP) system tailored for businesses seeking to manage finances, inventory, and customer interactions efficiently. Discussions highlight its suitability for companies outgrowing basic accounting software. It’s a scalable solution, adapting to evolving business needs. Users can expect features encompassing financial management, sales, CRM, and manufacturing. Recent online conversations mention its integration capabilities and the availability of resources for quick onboarding. The system aims to centralize data, improving decision-making and operational visibility, as indicated by user experiences shared online.

Key Features and Benefits

Sage 200 boasts several key features, including robust financial reporting, streamlined order processing, and comprehensive inventory management. Benefits include improved operational efficiency and better data visibility. Online discussions emphasize its scalability, allowing businesses to adapt as they grow. Users appreciate its ability to integrate with other systems. The system’s security features, like user permission controls, are also frequently mentioned. Furthermore, access to support and a community forum, as highlighted in user feedback, contributes to a positive user experience and faster problem resolution.

Getting Started with Sage 200

Initial setup involves verifying system requirements and a smooth installation process. Proper configuration is crucial for optimal performance and tailoring the system to specific business needs.

System Requirements

Sage 200 demands specific hardware and software to function optimally. Generally, a multi-core processor (Intel or AMD) is recommended, alongside at least 8GB of RAM, though 16GB is preferable for larger datasets.

Operating system compatibility includes recent versions of Windows Server and Windows 10/11 (64-bit). Database requirements typically involve Microsoft SQL Server, with specific versions supported depending on the Sage 200 edition.

Adequate disk space is essential – consider at least 20GB for the application and database, plus additional space for data storage. Network infrastructure should support stable connectivity for multi-user access. Consult the official Sage documentation for the most up-to-date and detailed specifications.

Installation Process

Sage 200 installation typically begins with obtaining the software package and license keys from an authorized Sage partner. The process involves running the setup wizard, accepting license agreements, and specifying the installation directory.

Crucially, ensure the SQL Server instance is correctly configured before initiating the Sage 200 installation. The wizard will prompt for SQL Server connection details.

During installation, you’ll define company settings and choose modules to install. Post-installation, a database creation process occurs. Thoroughly review the installation logs for any errors. Finally, verify the installation by launching the Sage 200 application.

Initial Configuration

Initial Sage 200 configuration is vital for optimal performance. Begin by defining core company details – name, address, and fiscal year settings. Next, configure chart of accounts based on your business needs, ensuring proper categorization for financial reporting.

Set up tax codes and VAT rates accurately. Define user roles and permissions to control access to sensitive data. Configure banking details for seamless bank reconciliation. Finally, customize system parameters like date formats and currency symbols to align with local requirements.

Navigating the Sage 200 Interface

Sage 200’s interface features a main menu for module access. Customization options allow users to tailor the layout for efficient workflow and data visibility.

Understanding the Main Menu

The Sage 200 Main Menu serves as the central hub for accessing all core functionalities. It’s logically organized into modules like Financials, Sales, Purchasing, and Manufacturing. Users can navigate via clearly labeled icons or text options. Recent discussions highlight the importance of familiarizing oneself with this structure for efficient operation. The menu’s layout is customizable, allowing users to prioritize frequently used modules. Understanding the menu’s hierarchy is crucial for quickly locating specific tasks and reports. Effective navigation significantly improves overall productivity within the Sage 200 system, streamlining daily workflows and data access.

Working with Modules

Sage 200’s modular design allows businesses to implement only the functionalities they require. Each module – Financials, Sales, Purchasing, Inventory, and more – operates as a self-contained unit, yet integrates seamlessly with others. Users access modules via the Main Menu. Discussions emphasize the importance of understanding data flow between modules for a holistic view of business operations. Customization options within each module allow tailoring to specific needs. Proper module configuration ensures accurate data capture and reporting, maximizing the system’s value and streamlining workflows across departments.

Customizing the User Interface

Sage 200 offers extensive user interface (UI) customization options. Users can personalize dashboards, modify screen layouts, and create custom reports to suit individual preferences and roles. This adaptability enhances efficiency and user adoption. While specific details aren’t readily available in the provided text, the ability to tailor the system is frequently discussed. Customization extends to menu structures and data views, allowing focused access to relevant information. Effective UI customization minimizes clicks and streamlines tasks, improving overall productivity within the Sage 200 environment.

Core Modules: Financial Management

Sage 200’s financial modules provide robust tools for managing accounts, processing transactions, and ensuring compliance. Key features include chart of accounts setup and reconciliation.

Chart of Accounts Setup

Establishing a well-defined chart of accounts is fundamental within Sage 200’s financial management. This involves categorizing all financial transactions to facilitate accurate reporting and analysis. Users can customize the chart to reflect their specific business needs, creating main accounts and sub-accounts for detailed tracking.

Proper setup ensures efficient accounts payable and receivable processes, alongside accurate bank reconciliation. Consider industry best practices and future reporting requirements during configuration. Sage 200 allows for importing existing charts, streamlining the initial setup process for businesses transitioning from other systems; Regular review and updates are crucial for maintaining accuracy.

Accounts Payable and Receivable

Sage 200’s Accounts Payable (AP) and Receivable (AR) modules efficiently manage vendor bills and customer invoices. AP allows for automated invoice processing, payment scheduling, and vendor statement reconciliation, ensuring timely payments and maximizing potential discounts. AR streamlines invoice creation, customer credit management, and payment application, accelerating cash flow.

These modules integrate seamlessly with the general ledger, providing a real-time view of financial position. Users can generate aging reports to identify overdue invoices and prioritize collection efforts. Effective utilization of AP and AR within Sage 200 is vital for maintaining healthy financial relationships.

Bank Reconciliation

Sage 200’s Bank Reconciliation module simplifies the process of matching bank statements with internal accounting records. This crucial function ensures the accuracy of financial data and detects discrepancies promptly. Users can import bank transactions directly, automating much of the matching process and reducing manual effort.

The system highlights unmatched transactions, allowing for investigation and correction of errors. Regular bank reconciliation within Sage 200 minimizes the risk of fraud and provides a clear audit trail. Accurate reconciliation is fundamental for reliable financial reporting and informed decision-making.

Inventory and Order Management

Sage 200 efficiently manages stock levels, sales orders, and purchase orders, optimizing the supply chain. It provides real-time visibility into inventory data.

Item Master Data

Item Master Data within Sage 200 forms the core of your inventory control. This section details crucial information for each product you handle, including descriptions, unit costs, selling prices, and supplier details. Accurate data entry is paramount for effective tracking and reporting.

You can categorize items for streamlined management, assign unique codes, and manage multiple units of measure. Sage 200 allows for detailed item attributes, supporting various industries and product types. Maintaining a clean and organized Item Master Data ensures accurate stock valuations and efficient order processing, ultimately improving profitability.

Sales Order Processing

Sales Order Processing in Sage 200 manages the entire sales cycle, from initial customer order to dispatch and invoicing. Begin by creating a sales order, specifying customer details, items, quantities, and pricing. The system automatically checks stock availability and reserves the necessary inventory.

You can then progress through stages like order confirmation, picking, packing, and shipping. Sage 200 supports partial deliveries and backorders. Once shipped, generate invoices directly from the sales order, streamlining billing. Efficient sales order processing minimizes errors and ensures timely fulfillment, enhancing customer satisfaction.

Purchase Order Management

Purchase Order Management within Sage 200 streamlines the procurement process. Initiate by creating a purchase request, converting it into a formal purchase order, and sending it to the supplier. The system tracks order status, from pending to received and invoiced.

Sage 200 facilitates efficient supplier management, including price lists and lead times. Upon goods receipt, accurately record quantities and quality. Matching purchase orders with supplier invoices simplifies reconciliation and payment processing. Effective purchase order management optimizes inventory levels, controls costs, and strengthens supplier relationships.

Reporting and Analysis

Sage 200 offers standard reports and custom report creation tools. Users can also leverage data export options for in-depth analysis.

Standard Reports

Sage 200 provides a wide array of pre-built, standard reports covering key business areas. These include financial statements like Profit and Loss, Balance Sheet, and Cash Flow statements. Inventory reports detail stock levels and movements, while sales reports analyze performance by customer, item, or region.

Purchase order reports offer insights into supplier spending, and aged debtor/creditor reports assist with cash flow management; These reports are readily accessible and customizable to some extent, allowing users to filter data and adjust display options to meet specific informational needs. They form a solid foundation for business monitoring.

Custom Report Creation

Sage 200 empowers users to build custom reports beyond the standard offerings. Utilizing the integrated reporting tools, you can define specific data criteria and layouts. This often involves leveraging SQL queries or the report writer functionality to extract and present information tailored to unique business requirements.

While requiring some technical skill, custom report creation allows for granular control over data analysis. Users can design reports focusing on niche metrics, combine data from multiple modules, and create visualizations to enhance understanding. This flexibility is crucial for informed decision-making.

Data Export Options

Sage 200 provides several data export options to facilitate integration with other systems and external analysis. Users can typically export data in common formats like Microsoft Excel (.xlsx), CSV (Comma Separated Values), and PDF. These exports allow for further manipulation and reporting outside of the Sage 200 environment.

More advanced options may include exporting data directly to SQL databases or utilizing APIs for automated data transfer. Careful consideration should be given to data security and formatting during the export process to ensure data integrity and compatibility with the destination system.

User Management and Security

Sage 200 offers robust user management features, including account creation and permission assignment, vital for maintaining data security and control.

Creating User Accounts

Creating user accounts in Sage 200 is a fundamental security practice. Access the ‘User Management’ module within the system settings. Define a unique username and a strong, complex password for each user, adhering to password policies. Assign appropriate roles based on job responsibilities – administrator, financial, sales, etc. Carefully consider the level of access each role requires to sensitive data.

Ensure each user understands their login credentials and the importance of maintaining confidentiality. Regularly review user accounts and disable those no longer needed. This proactive approach minimizes potential security risks and maintains data integrity within your Sage 200 environment.

Assigning User Permissions

Assigning user permissions in Sage 200 is crucial for data security and workflow efficiency. After creating user accounts, navigate to the ‘Security Roles’ section. Each role defines a set of permissions – access to specific modules, data editing capabilities, and report generation rights. Carefully map roles to job functions, granting only necessary access.

Avoid granting excessive permissions; the principle of least privilege is key. Regularly audit user permissions to ensure they remain aligned with current roles and responsibilities. This granular control protects sensitive information and maintains data accuracy within the Sage 200 system.

Security Best Practices

Implementing robust security within Sage 200 is paramount. Utilize strong, unique passwords for all user accounts and enforce regular password changes. Enable two-factor authentication whenever possible for an added layer of protection. Regularly back up your Sage 200 data and store backups securely, offsite if feasible.

Keep your Sage 200 software updated with the latest security patches. Limit physical access to servers hosting Sage 200. Regularly review audit trails to detect and investigate any suspicious activity. Educate users about phishing scams and social engineering tactics to prevent unauthorized access.

Troubleshooting Common Issues

Common issues in Sage 200 often involve error messages or data recovery needs. Contacting Sage support directly is recommended for complex problems and solutions;

Error Messages and Solutions

Encountering error messages within Sage 200 is common, often stemming from data inconsistencies or system conflicts. Initial troubleshooting involves carefully noting the error code and message details. Many issues can be resolved by verifying data integrity, ensuring proper user permissions, and restarting the application.

If the error persists, consulting the Sage 200 documentation or online knowledge base is crucial. Recent discussions highlight the importance of regular data backups to facilitate recovery from unforeseen errors. For complex or critical errors, directly contacting Sage support provides expert assistance and tailored solutions.

Data Backup and Recovery

Regular data backups are paramount for Sage 200 users, safeguarding against data loss due to hardware failures, accidental deletions, or cyber threats. Implement a scheduled backup routine, storing copies both on-site and off-site for redundancy. Sage recommends utilizing its built-in backup utilities or third-party solutions.

In the event of data corruption or system failure, a robust recovery plan is essential. Test your backups periodically to ensure their integrity and the restoration process functions correctly. Discussions emphasize the value of documented procedures for swift and efficient data recovery, minimizing business disruption.

Contacting Sage Support

Sage 200 users have several avenues for accessing support. The official Sage website provides extensive documentation, FAQs, and a knowledge base to address common issues. Direct support can be obtained through Sage’s online support portal, offering chat, email, and phone assistance, potentially involving associated fees depending on your support plan.

Community forums and user groups also provide valuable peer-to-peer support and troubleshooting advice. When contacting support, gather relevant information like error messages, system details, and a clear description of the problem to expedite resolution.

Continue Reading

mini educator instructions

Mini Educator Instructions: A Comprehensive Guide

E-Collar Technologies’ Mini Educator is a trusted‚ humane training tool‚ offering compact design and customizable features. This guide provides essential information for effective and safe usage.

Owners’ manuals and quick start guides are readily available for download‚ ensuring users have comprehensive knowledge. Proper usage leads to a well-behaved and happy dog!

Understanding the Mini Educator

The Mini Educator‚ produced by E-Collar Technologies‚ represents a significant advancement in remote dog training. It’s designed not as a quick fix‚ but as a tool to enhance communication and build a stronger relationship with your canine companion. Understanding its core principles is crucial for successful and humane application.

Unlike older e-collar models‚ the Mini Educator prioritizes precision and control. It offers a wide range of adjustable stimulation levels‚ allowing trainers to find the lowest effective setting for each individual dog. The device also incorporates a pager/vibration function‚ providing a non-shock alternative for communication.

Effective use hinges on understanding that the collar isn’t about punishment; it’s about providing clear‚ consistent feedback. The goal is to teach your dog what not to do‚ and redirect them towards desired behaviors. Accessing the official manual is highly recommended to fully grasp the system’s capabilities and safety features. Remember‚ consistent training yields the best results.

What is the Mini Educator?

The Mini Educator is a remote training collar designed by E-Collar Technologies to aid in dog obedience and behavioral modification. It’s a compact‚ lightweight device intended for dogs of all sizes and breeds‚ offering a humane approach to training through remote communication.

Unlike traditional collars‚ the Mini Educator utilizes electronic stimulation – adjustable levels of tone‚ vibration‚ and static correction – to deliver clear signals to the dog. These signals aren’t meant to inflict pain‚ but rather to interrupt unwanted behaviors and redirect attention. The device’s small size makes it comfortable for the dog to wear‚ and the transmitter is ergonomically designed for easy handling.

A key feature is its versatility; it’s suitable for basic obedience‚ addressing reactive behaviors‚ and even remote recall training. The official manual provides detailed instructions on proper usage‚ emphasizing the importance of starting with the lowest stimulation level and gradually increasing it only if necessary. It’s a tool for enhancing communication‚ not coercion.

Key Features and Benefits

The Mini Educator boasts several key features contributing to its effectiveness. Its compact design ensures comfort for dogs‚ even smaller breeds‚ while the transmitter’s ergonomic shape allows for easy‚ one-handed operation. A significant benefit is the wide range of stimulation levels – tone‚ vibration‚ and static – enabling customized training tailored to each dog’s temperament and sensitivity.

Users appreciate the momentary and continuous stimulation options‚ providing flexibility in correcting behaviors. The built-in pager/vibration function offers a gentler alternative for initial training or sensitive dogs. Furthermore‚ the ability to lock stimulation levels prevents accidental increases during sessions.

Benefits extend beyond basic obedience. The Mini Educator effectively addresses reactive behaviors and strengthens recall‚ enhancing safety and freedom for both dog and owner. Accessing the official manual unlocks the full potential of these features‚ ensuring responsible and successful training. It’s a tool promoting a happier‚ well-behaved companion.

Mini Educator Models: ET-300‚ ET-400‚ and Beyond

E-Collar Technologies offers a range of Mini Educator models‚ each designed to meet specific training needs. The ET-300 is a popular entry-level option‚ ideal for dogs with moderate temperaments and shorter ranges. Stepping up‚ the ET-400 provides an extended range and higher stimulation levels‚ suitable for more stubborn or high-drive dogs.

Beyond these core models‚ E-Collar Technologies continually innovates‚ releasing updated versions and specialized collars. These advancements often include enhanced features like improved waterproofing‚ longer battery life‚ and more precise stimulation control. Understanding the differences between models is crucial for selecting the best fit.

Regardless of the model‚ accessing the official product manual is paramount. These manuals detail the specific features and operating instructions for each device‚ ensuring safe and effective use. Owners should consult the manual to maximize the benefits of their chosen Mini Educator and achieve optimal training results.

Getting Started with Your Mini Educator

Begin by unboxing and familiarizing yourself with all components. Ensure the transmitter and receiver are fully charged before initial use‚ and consult the owner’s manual.

Unboxing and Component Overview

Upon receiving your Mini Educator‚ carefully open the packaging to reveal the included components. You should find the handheld transmitter‚ the receiver collar‚ a charging cable – often USB-based – and contact point sets of varying lengths. These contact points are crucial for a proper and comfortable fit for your dog.

Inspect each item for any visible damage. The transmitter features buttons for stimulation control and a digital display. The receiver collar houses the stimulation unit and should feel robust yet lightweight. Different models‚ like the ET-300 or ET-400‚ may have slight variations in design‚ but the core components remain consistent.

Familiarize yourself with the layout of the transmitter buttons. Understanding their functions – power‚ stimulation adjustment‚ momentary/continuous settings – is vital before proceeding. The owner’s manual provides a detailed diagram. Take a moment to identify each part and understand its purpose. Proper component identification sets the stage for successful training.

Charging the Transmitter and Receiver

Before initial use‚ fully charge both the transmitter and the receiver collar. Typically‚ a USB cable is provided for this purpose. Connect the cable to a suitable power source – a computer USB port or a USB wall adapter – and then to the charging ports on each device. Charging times vary‚ but generally‚ allow several hours for a complete charge.

During charging‚ an indicator light on both units will illuminate‚ often red while charging and turning green when fully charged. Avoid using the devices while they are charging. A full charge ensures optimal performance and prevents interruptions during training sessions.

Regular charging is essential to maintain consistent functionality. The frequency of charging depends on usage‚ but it’s advisable to charge them after each training session or at least once a week with moderate use. Refer to your owner’s manual for specific charging recommendations related to your Mini Educator model.

Proper Fit and Placement of the Receiver Collar

Achieving a secure and comfortable fit is crucial for effective and humane training. The receiver collar should be positioned high on the dog’s neck‚ directly behind the earlobes. This placement ensures consistent contact with the skin and optimal signal transmission.

Ensure you can comfortably slide two fingers between the collar and your dog’s neck. This allows for necessary movement without being too loose or restrictive. A too-tight collar can cause discomfort‚ while a too-loose collar may slip or provide inconsistent stimulation.

Regularly check the fit‚ especially during active training sessions. Adjust as needed to maintain the two-finger rule. Avoid placing the collar directly over the trachea or Adam’s apple. Always prioritize your dog’s comfort and well-being when fitting the receiver collar. Proper fit maximizes training effectiveness and minimizes any potential discomfort.

Understanding Stimulation Levels

The Mini Educator features adjustable stimulation levels‚ allowing for precise and customized training. It’s vital to start at the lowest possible level and gradually increase it only if necessary to gain your dog’s attention. The goal isn’t to punish‚ but to communicate effectively.

Each dog has a unique sensitivity; what works for one may not work for another. Observe your dog’s response closely. A slight head turn or ear twitch indicates the level is being noticed. Avoid levels that cause obvious distress or fear.

Locking the stimulation level prevents accidental increases during training. Familiarize yourself with the transmitter’s button functions to adjust and lock levels confidently. Remember‚ consistency and patience are key. Proper understanding of stimulation levels ensures a safe and effective training experience for both you and your dog.

Operating the Mini Educator

Mastering the transmitter’s button functions is crucial for effective control. Learn to adjust stimulation‚ utilize momentary and continuous settings‚ and employ the pager/vibration feature for nuanced communication.

Transmitter Button Functions

Understanding the Mini Educator’s transmitter buttons is fundamental to successful operation. The primary buttons control stimulation levels‚ allowing for precise adjustments based on your dog’s needs and sensitivity. Typically‚ separate buttons are dedicated to increasing and decreasing intensity‚ offering granular control over the correction;

A crucial feature is the ‘lock’ function‚ preventing accidental level changes during training sessions. This ensures consistency and avoids unintended escalation of stimulation. The momentary button delivers a pulse only while pressed‚ ideal for marking desired behaviors. Conversely‚ the continuous stimulation button provides a sustained signal until released‚ useful for reinforcing distance work or addressing persistent issues.

Furthermore‚ the transmitter incorporates a pager or vibration function‚ serving as a subtle cue for attention or recall. Familiarizing yourself with each button’s purpose and practicing their use will significantly enhance your training effectiveness and ensure a positive experience for your canine companion. Refer to your owner’s manual for specific button layouts and functionalities related to your Mini Educator model.

Adjusting Stimulation Levels

Precisely adjusting stimulation levels on your Mini Educator is paramount for effective and humane training. Begin with the lowest possible setting and gradually increase it until you observe a noticeable behavioral response from your dog – a subtle ear twitch‚ head turn‚ or change in pace. This indicates the level is being perceived without causing discomfort.

Avoid jumping to higher levels prematurely; slow and incremental adjustments are key. The goal isn’t to inflict punishment‚ but to establish clear communication. Remember to ‘lock’ the desired level once established to prevent accidental changes during a session. Regularly reassess the level as your dog progresses‚ potentially reducing it as responsiveness improves.

Understanding your dog’s individual sensitivity is crucial. Factors like breed‚ temperament‚ and coat thickness can influence perception. Always prioritize your dog’s well-being and discontinue use if any signs of distress are observed. Consult the official manual for detailed guidance specific to your Mini Educator model and responsible stimulation practices.

Momentary vs. Continuous Stimulation

The Mini Educator offers two primary stimulation modes: momentary and continuous. Momentary stimulation delivers a brief pulse of energy with each button press‚ ideal for precise corrections and marking desired behaviors. It’s akin to a quick “tap” to redirect attention or interrupt unwanted actions. This is generally preferred for most training scenarios.

Continuous stimulation‚ activated by holding the button down‚ provides a sustained level of energy. While potentially useful in specific situations – like maintaining pressure during a recall – it requires careful application to avoid causing undue stress or anxiety. It’s crucial to release the button immediately once the desired response is achieved.

Mastering the distinction between these modes is vital for effective communication. Momentary is often favored for its subtlety and precision‚ while continuous demands greater control and awareness. Always prioritize the lowest effective level and observe your dog’s reaction closely‚ referring to the official manual for detailed guidance on appropriate usage.

Using the Pager/Vibration Function

The Mini Educator’s pager‚ or vibration function‚ serves as a valuable tool for low-intensity communication‚ particularly useful for dogs sensitive to electrical stimulation or during initial training phases. It delivers a gentle buzzing sensation to the receiver collar‚ acting as a subtle cue to gain your dog’s attention or reinforce known commands.

The pager can be employed for recall training‚ marking behaviors‚ or simply checking in with your dog. It’s an excellent alternative to stimulation when a less intrusive signal is desired. Remember‚ consistency is key; pair the vibration with a verbal cue to establish a clear association.

Many trainers recommend starting with the pager function to build a foundation of communication before introducing higher stimulation levels. It’s a humane and effective way to enhance your training efforts‚ fostering a positive learning experience for your canine companion. Results are often better when utilizing this function!

Training with the Mini Educator

Effective training utilizes the Mini Educator for basic obedience‚ addressing behavioral issues‚ and remote recall. It’s particularly helpful for reactive dogs‚ requiring consistent‚ humane application of techniques.

Basic Obedience Training

Establishing foundational commands like sit‚ stay‚ come‚ and heel is crucial with the Mini Educator. Begin in a controlled‚ distraction-free environment. Introduce the collar and low stimulation levels gradually‚ associating them with the desired behavior.

For “sit‚” gently apply pressure on the rear while simultaneously giving the verbal cue. If the dog hesitates‚ a brief‚ low-level stimulation can encourage compliance‚ immediately followed by praise and a reward. Repeat this process consistently.

Similarly‚ for “come‚” use a cheerful tone and gentle encouragement. If the dog doesn’t respond‚ a single‚ mild stimulation can prompt a return‚ again paired with enthusiastic praise. Avoid harsh corrections; the goal is to guide‚ not punish.

Remember‚ the Mini Educator is a communication tool. Consistent‚ positive reinforcement alongside the collar’s use will yield the best results‚ fostering a stronger bond and a well-behaved companion. Patience and understanding are key to successful training.

Addressing Common Behavioral Issues

The Mini Educator can effectively address issues like excessive barking‚ jumping‚ and leash pulling. For barking‚ identify the trigger and use the collar to interrupt the behavior before it escalates‚ paired with a “quiet” command. Low-level stimulation should cease the barking immediately‚ followed by praise when quiet.

To curb jumping‚ anticipate the behavior and apply a brief stimulation as the dog initiates the jump. This teaches them that jumping doesn’t result in attention. Consistent application is vital.

Leash pulling can be corrected by applying gentle stimulation when the dog surges forward‚ simultaneously saying “easy.” The goal is to teach loose-leash walking.

Remember‚ the Mini Educator isn’t a quick fix. It requires consistent application‚ clear communication‚ and understanding your dog’s triggers. Always prioritize positive reinforcement alongside the collar’s use‚ building a stronger‚ more obedient relationship. Avoid flooding or excessive stimulation.

Training for Reactive Dogs

Training reactive dogs with the Mini Educator demands a cautious and methodical approach. Reactivity‚ often stemming from fear or frustration‚ requires desensitization and counter-conditioning. Begin at a distance where the dog notices the trigger but remains calm.

Use the collar on a low setting to interrupt the reactive behavior – barking‚ lunging – before it escalates. Simultaneously‚ redirect the dog’s attention with a known command like “look at me.” Reward calm behavior generously.

Gradually decrease the distance to the trigger as the dog demonstrates consistent calm responses. The Mini Educator helps create a “behavioral break‚” allowing you to regain control and redirect focus.

Consistency and patience are paramount. Avoid overwhelming the dog. Professional guidance from a certified trainer experienced in reactivity is highly recommended. Remember‚ the goal isn’t suppression‚ but changing the dog’s emotional response to the trigger.

Remote Recall Training

Remote recall training with the Mini Educator builds upon foundational obedience. Start in a controlled‚ distraction-free environment. Associate the recall command (“Come!”) with a positive experience – praise‚ treats. Once reliable‚ introduce the collar on a very low setting.

At a short distance‚ give the recall command. If the dog hesitates‚ use a brief stimulation to encourage response. Immediately reward enthusiastic recall with high-value reinforcement. Gradually increase distance and introduce mild distractions.

The Mini Educator isn’t a punishment tool for failed recalls; it’s a communication aid. It provides a gentle prompt to overcome distractions. Avoid overuse; the goal is a reliable recall based on positive association.

Progress to varied locations and increasing distractions. Practice “proofing” the recall by adding duration and distance. Remember consistency and positive reinforcement are key. A reliable remote recall offers freedom and safety for your dog.

Safety and Maintenance

Prioritize safety by following precautions and understanding potential issues. Regular cleaning and proper storage extend the Mini Educator’s lifespan. Access official manuals for support!

Important Safety Precautions

Prioritize your dog’s well-being when utilizing the Mini Educator. Always begin training at the lowest stimulation level‚ gradually increasing only if necessary to achieve a response. Avoid continuous stimulation‚ opting for momentary taps to communicate effectively.

Never use the Mini Educator as punishment; it’s a communication tool for training. Regularly inspect the receiver collar for skin irritation or pressure sores‚ ensuring a comfortable fit. Do not leave the collar on for extended periods.

Supervise your dog during initial training sessions. Be mindful of your dog’s behavior and adjust training accordingly. If you observe signs of distress‚ immediately discontinue use and consult a professional dog trainer. Familiarize yourself with the complete owner’s manual before operation.

Ensure the transmitter is secure and out of reach of children. Misuse can lead to unintended stimulation. Remember‚ responsible use is crucial for a positive training experience and a happy‚ well-behaved companion.

Troubleshooting Common Issues

If the receiver isn’t responding‚ first verify the transmitter and receiver are fully charged. Ensure they are paired correctly‚ referencing the owner’s manual for pairing instructions. Check the stimulation level; it may be set too low to elicit a response.

Experiencing a short battery life? Reduce the stimulation level or frequency of use. Ensure the charging port is clean and free of debris. If the collar isn’t fitting correctly‚ adjust it for a snug‚ but comfortable‚ fit.

Dog not responding to stimulation? Gradually increase the level‚ observing for any reaction. Consider consulting a professional trainer for guidance. Download the official manual for detailed troubleshooting steps.

For persistent issues‚ contact E-Collar Technologies support for assistance. Proper maintenance and understanding of the system are key to resolving common problems and maximizing training effectiveness.

Cleaning and Storage

Regular cleaning is crucial for maintaining the Mini Educator’s performance and hygiene. After each use‚ wipe down the receiver collar with a damp cloth to remove dirt and debris. Avoid using harsh chemicals or abrasive cleaners‚ as these can damage the components.

For the transmitter‚ gently clean the surface with a soft‚ dry cloth. Ensure the charging port is free from lint or moisture before charging. Proper cleaning extends the lifespan of your training tool.

When storing the Mini Educator‚ ensure both the transmitter and receiver are completely dry. Store them in a cool‚ dry place‚ away from direct sunlight and extreme temperatures. Keeping them in the original packaging is recommended.

Long-term storage requires a full charge of the batteries before storing. Periodically check the charge level to prevent battery degradation. Following these guidelines ensures your Mini Educator remains in optimal condition for future training sessions.

Accessing the Official Manual and Support

E-Collar Technologies provides comprehensive resources to support Mini Educator users. The official product manual is readily available for download directly from their website‚ offering detailed instructions and troubleshooting guidance.

Quick start guides are also accessible‚ providing a concise overview for initial setup and operation. These resources cover everything from understanding button functions to adjusting stimulation levels effectively.

For direct assistance‚ E-Collar Technologies offers dedicated customer support channels. Users can contact them via phone or email to address specific questions or concerns regarding their Mini Educator.

Online forums and communities dedicated to e-collar training can also provide valuable insights and peer support. These platforms allow users to share experiences and learn from others. Remember to always prioritize humane training practices and consult the official manual for accurate information. Accessing these resources ensures a positive and effective training experience.

Continue Reading

knack trophy guide

Knack Trophy Guide: A Comprehensive Overview (Updated 04/07/2026)

Knack, rated E10 with fantasy violence, offers a diverse trophy list encompassing combat, exploration, and completion, demanding skillful gameplay and dedication from players.

Knack’s trophy list presents a compelling challenge for PlayStation enthusiasts, blending straightforward achievements with demanding tasks that truly test a player’s mastery of the game’s unique mechanics. Rated E10 by the ESRB for Fantasy Violence, Knack offers a family-friendly action-adventure experience, but don’t let that fool you – earning that Platinum trophy requires dedication!

The trophies span the breadth of gameplay, from simply defeating enemies and collecting relics to mastering combat combos, completing all chapters, and tackling challenging time trials. This guide aims to provide a comprehensive roadmap to unlocking all Knack’s trophies, ensuring a rewarding and fulfilling experience for all players;

Difficulty and Trophy Guide Scope

Knack isn’t notoriously difficult, but achieving 100% completion presents a moderate challenge, primarily due to the time trials and thorough relic collection. The base game’s difficulty is manageable for most players, even those new to the action-adventure genre. However, mastering Knack’s transformations and combat system is crucial for efficient trophy hunting.

This guide will cover all trophies obtainable in the core Knack experience, detailing strategies for both straightforward and challenging achievements. We’ll highlight any potentially missable trophies and offer tips for optimizing your playthrough. New Game Plus opportunities and potential hidden content will also be briefly addressed.

Gameplay Mechanics & Trophy Relevance

Knack’s core mechanics – transformations and combat – directly influence trophy progression, requiring players to adapt and master both for optimal success.

Understanding Knack’s Transformations

Knack’s unique ability to grow and shrink is central to both gameplay and trophy acquisition. Smaller forms allow access to hidden areas crucial for relic collection, directly impacting the “Relic Hunter” trophy. Conversely, larger forms are essential for overcoming powerful enemies and navigating certain combat scenarios.

Mastering these transformations isn’t merely about size; it’s about strategic application. Players must quickly switch between forms to solve puzzles, exploit enemy weaknesses, and efficiently traverse levels. Several trophies implicitly require proficient transformation usage, demanding adaptability and precise timing throughout the adventure. Understanding these nuances is key to 100% completion.

Combat System and Trophy Implications

Knack’s combat revolves around a fluid system of punches, kicks, and special attacks, amplified by relic-powered abilities. The “Combo Master” trophy necessitates chaining attacks effectively, demanding players learn enemy attack patterns and timing. Utilizing gadgets strategically, as highlighted by the “Gadgeteer” trophy, further enhances combat prowess.

Successfully defeating waves of enemies, particularly in timed challenges, is crucial. Mastering Knack’s diverse moveset and understanding enemy vulnerabilities are paramount. Several trophies are tied to specific combat encounters, requiring precise execution and strategic thinking to overcome challenging foes and unlock platinum success.

Trophy Breakdown: Bronze Trophies

Bronze trophies in Knack are easily attainable, focusing on initial gameplay milestones like defeating the first enemy, collecting relics, and mastering basic combos.

“Small Victory” ─ First Enemy Defeated

“Small Victory” is arguably the easiest trophy in Knack, awarded immediately upon defeating your first goblin opponent. This occurs very early in the game during the initial tutorial stages, requiring minimal effort or skill. Players don’t need to employ any specific strategies; simply engage in basic combat and eliminate the enemy.

This trophy serves as a gentle introduction to the game’s combat system and provides a quick confidence boost for new players. It’s unmissable as it’s integral to progressing through the story. There are no specific requirements beyond simply winning the first encounter, making it a guaranteed achievement for everyone.

“Relic Hunter” ─ Collecting Relics

“Relic Hunter” requires collecting 50 Relics scattered throughout the levels of Knack. These glowing fragments are often hidden in destructible environments, off the beaten path, or within secret areas. Players should thoroughly explore each stage, breaking crates, walls, and other objects to uncover them.

Relics are crucial for Knack’s growth, but collecting 50 is primarily for this trophy. Some levels offer more Relics than others, so revisiting stages can be necessary. Paying attention to visual cues and utilizing Knack’s various abilities to reach hidden spots is key to maximizing your collection efficiency.

“Combo Master” ─ Achieving Combat Combos

“Combo Master” challenges players to demonstrate proficiency in Knack’s combat system by achieving a combo of 20 hits without taking damage. This requires mastering timing, utilizing various attack combinations, and effectively dodging enemy attacks. Focus on weaker enemies initially to build confidence and practice chaining attacks seamlessly.

Experiment with different moves and learn enemy attack patterns. Utilizing Knack’s special abilities during combos can extend them significantly. Maintaining momentum and avoiding interruptions are crucial for success. Patience and practice are key to unlocking this trophy, showcasing true combat mastery.

Trophy Breakdown: Silver Trophies

Silver trophies in Knack demand consistent progress, requiring players to level up, skillfully use gadgets, and uncover hidden areas throughout the adventure.

“Level Up!” ー Character Progression

Achieving this Silver trophy requires dedicated character progression within Knack. Players must consistently defeat enemies and collect relics to accumulate experience points. These points are then used to upgrade Knack’s various abilities, increasing his strength, speed, and overall combat effectiveness.

Strategic upgrading is key; focus on abilities that complement your playstyle. Reaching the maximum level demonstrates a thorough understanding of the game’s systems and a commitment to optimizing Knack’s potential. It’s a testament to your dedication and mastery of the core gameplay loop, proving you’ve truly invested time in enhancing Knack’s capabilities.

“Gadgeteer” ─ Utilizing Gadgets Effectively

Earning the “Gadgeteer” Silver trophy in Knack demands skillful utilization of the game’s diverse gadget arsenal. Players aren’t simply meant to blast through enemies; strategic gadget deployment is crucial for overcoming challenges and maximizing combat efficiency. Experiment with different gadgets to discover their unique applications in various scenarios.

Mastering gadget combinations and timing is essential. Successfully employing gadgets to solve puzzles or defeat tougher enemies showcases a deep understanding of the game’s mechanics and a creative approach to problem-solving. This trophy rewards players who go beyond basic combat and truly embrace Knack’s inventive toolkit.

“Hidden Areas” ─ Discovering Secret Locations

The “Hidden Areas” Silver trophy in Knack challenges players to thoroughly explore each level, venturing off the beaten path to uncover concealed locations. These aren’t always immediately obvious; keen observation and a willingness to experiment are key. Look for subtle visual cues, destructible environments, and areas that seem inaccessible at first glance.

Discovering these hidden areas often rewards players with valuable relics, upgrade materials, or even secret challenges. This trophy encourages a meticulous approach to level design, rewarding curiosity and a dedication to complete exploration throughout the entire game.

Trophy Breakdown: Gold Trophies

Gold trophies signify mastery in Knack, requiring dedication to complete all chapters and demonstrate exceptional skill in challenging time trial events.

“Completionist” ─ Finishing All Chapters

Achieving the “Completionist” trophy demands players fully experience Knack’s narrative, successfully navigating every chapter across all difficulty settings. This isn’t simply beating the story; it’s about thoroughly engaging with each level’s unique challenges and environments. Players should prioritize relic hunting during their playthrough, as some are easily missed and contribute to other trophies.

Expect varied gameplay, from intense combat sequences to intricate puzzle-solving sections. Mastering Knack’s transformations is crucial for overcoming obstacles and efficiently progressing. Replaying chapters on harder difficulties adds significant challenge, requiring strategic thinking and precise execution. This trophy represents a complete and satisfying Knack journey.

“Time Trialist” ー Completing Time Trials

The “Time Trialist” trophy tests players’ mastery of Knack’s levels and combat system, demanding swift and efficient completion of designated time trials. These challenges require precise movement, optimized combat strategies, and a thorough understanding of level layouts. Mastering Knack’s transformations is vital for maximizing speed and minimizing wasted time.

Expect to replay each time trial multiple times, refining your route and execution. Utilizing Knack’s abilities strategically, such as dashing and powerful attacks, is key to shaving off precious seconds. This trophy isn’t about brute force; it’s about finesse and optimization.

Trophy Breakdown: Platinum Trophy

“Ultimate Knack” signifies total dedication, requiring players to unlock every other trophy in the game—a testament to skill and completionist fervor!

“Ultimate Knack” ─ Obtaining All Other Trophies

The Platinum trophy, “Ultimate Knack,” represents the pinnacle of achievement within the game, demanding a comprehensive mastery of all its challenges. This isn’t simply about beating the final boss; it’s a testament to a player’s dedication to exploring every facet of Knack’s world.

Successfully earning this coveted reward requires unlocking all Bronze, Silver, and Gold trophies, signifying completion of chapters, skillful combat, relic hunting, gadget utilization, and time trial proficiency. Prepare for a lengthy journey, potentially requiring multiple playthroughs to uncover hidden areas and master the intricacies of Knack’s transformations. It’s a true badge of honor for dedicated players!

Challenge & Missable Trophies

Knack presents challenges requiring precise timing and strategy; certain relics and hidden areas are easily missed, demanding thorough exploration during each playthrough.

Identifying Missable Trophies

Several Knack trophies are easily missed, primarily those tied to collecting all relics within each chapter. These relics are often hidden in secret areas, requiring extensive exploration and sometimes, skillful use of Knack’s transformations to reach them. Failing to collect them during a chapter means revisiting it later, potentially increasing playtime.

Time Trial trophies also fall into the missable category, as they are only available during specific chapter sections. Furthermore, certain combat-related achievements might be harder to obtain in later playthroughs if you rush through the story. A diligent approach and a focus on thoroughness are crucial to avoid needing multiple playthroughs for 100% completion.

Strategies for Difficult Challenges

Mastering Knack’s transformations is key to overcoming challenging encounters. Switching between large and small forms strategically allows for both powerful attacks and access to previously unreachable areas. For Time Trials, prioritize efficient movement and learn optimal routes through each stage, utilizing Knack’s speed and agility.

Combat challenges often require exploiting enemy weaknesses and utilizing combos effectively. Don’t hesitate to experiment with different gadget combinations to maximize damage output. Finally, patience and persistence are vital; some challenges demand multiple attempts to perfect timing and execution.

Post-Game Content & Trophies

Knack 2’s New Game Plus offers replayability, while hidden bosses present unique challenges and trophy opportunities for dedicated players seeking ultimate completion.

New Game Plus and Trophy Opportunities

Knack 2’s New Game Plus mode significantly extends the game’s lifespan, allowing players to re-experience the story with their fully upgraded Knack. This isn’t merely a difficulty increase; it introduces new challenges and opportunities to refine combat strategies and explore levels with enhanced abilities. While New Game Plus doesn’t directly unlock new trophies, it provides an ideal environment to optimize performance for speedrunning or perfecting combat encounters.

Players aiming for 100% completion can leverage New Game Plus to efficiently farm relics or master difficult combat scenarios, preparing them for any potential challenges. It’s a valuable tool for trophy hunters seeking to refine their skills and achieve mastery over Knack’s gameplay mechanics.

Hidden Bosses and Related Trophies

Knack features several optional bosses concealed throughout the game world, presenting significant challenges for dedicated trophy hunters. These encounters aren’t mandatory for story progression, making them easily missable on a standard playthrough. Defeating these hidden bosses often unlocks unique trophies, rewarding players for thorough exploration and skillful combat.

Successfully overcoming these optional challenges demands mastery of Knack’s transformation abilities and a strategic approach to combat. Players should prioritize upgrading Knack’s skills and collecting powerful relics to prepare for these demanding encounters, ensuring a rewarding trophy-hunting experience.

Useful Resources & Community Links

Online forums and video walkthroughs provide invaluable assistance for Knack trophy hunters, offering strategies and guidance for challenging achievements and secrets.

Online Forums and Guides

Dedicated online forums, such as those found on PlayStation-focused websites and Reddit communities (r/Knack, for example, if it exists), are excellent resources for Knack trophy hunters. Players frequently share tips, strategies, and detailed guides for overcoming difficult challenges and locating missable collectibles. These communities often host collaborative efforts to document optimal routes for time trials and identify the most efficient methods for earning specific trophies.

External guide websites, like those specializing in PlayStation trophy guides, provide written walkthroughs and detailed explanations of each trophy’s requirements. These guides often include screenshots and videos to illustrate key steps and strategies, making them accessible to players of all skill levels. Regularly checking these resources can significantly streamline the trophy-hunting process.

Video Walkthroughs and Tutorials

Visual learners will find comprehensive Knack trophy walkthroughs on platforms like YouTube and Twitch invaluable. These videos demonstrate optimal strategies for tackling challenging combat encounters, navigating complex levels, and efficiently collecting all required relics and hidden areas. Many creators offer step-by-step guides, showcasing precise timing and techniques for earning difficult trophies, such as those related to time trials.

Tutorials focusing on specific trophy requirements, like mastering Knack’s transformations or utilizing gadgets effectively, can significantly reduce frustration. Searching for “Knack trophy guide” on these platforms yields numerous results, allowing players to choose a style and approach that best suits their learning preferences.

Continue Reading